5 Steps to Convert a Bathtub into a Wheelchair Accessible Shower

Our aging housing stock in the United States is not prepared to accommodate our aging population. No place is this more evident than in bathrooms. Many homes built before the 1970’s have small 5’ x 7’ bathrooms with combination tub/showers which are difficult and dangerous for older people (and those with mobility challenges) to get into. Check out the video below and read the 5 steps to convert a bathtub into a wheelchair accessible shower to eliminate the worries associated with climbing into a tub.
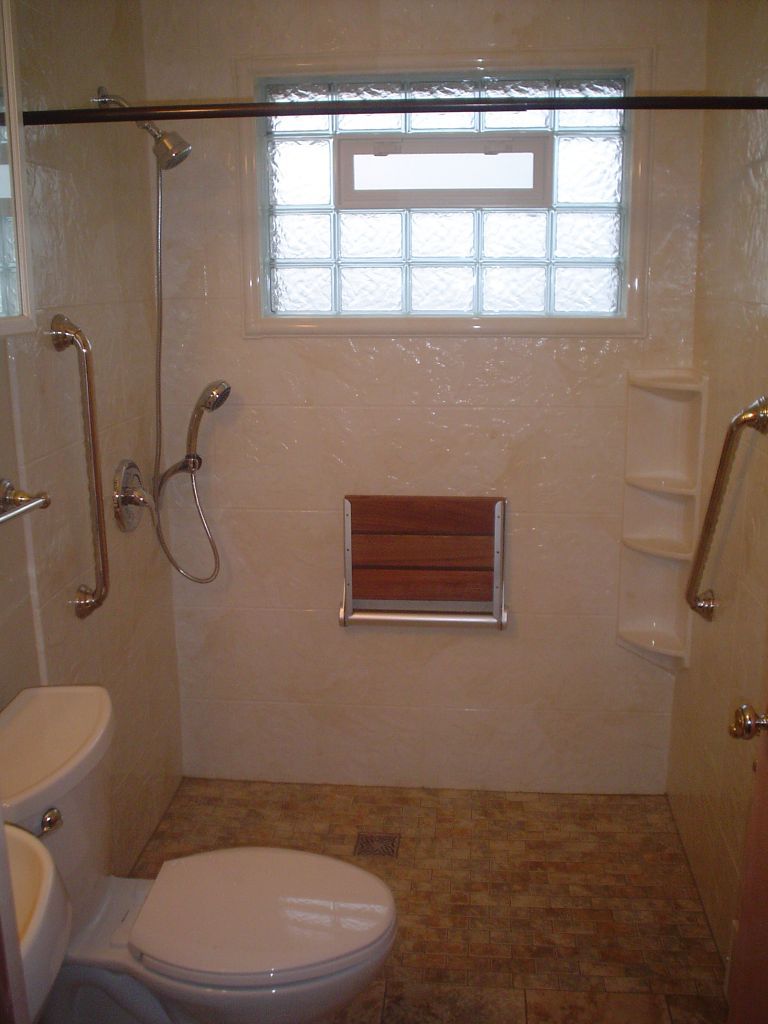
Step 1 – Determine who will be using the shower and consider their current and future needs – A wheelchair accessible shower must be designed with an eye towards the future. Should the space be designed with grab bars and fold down seats? Should niches be placed lower to make them easier to reach for someone in a seated position? If you’re not sure how to plan this space consult with a CAPS (Certified Aging in Place Specialist) or an Occupational Therapist.
Step 2 – Identify the best place for the shower – It’s usually more cost effective to put the shower in the same place as the existing tub/shower so plumbing and drains do not need to moved – but sometimes the current location does not permit enough turning radius for a wheelchair. A bathroom designer can help to guide you through this process.
Step 3 – Choose the right shower base – If space is limited you might need to use a glass reinforced plastic base to create a zero threshold barrier free wet room. If you’ve got a tighter budget a ready for tile, acrylic or fiberglass base which is barrier free or has a ramp may be the best choice.
Step 4 – Select a shower wall surround – Choices in wall surrounds can vary greatly in cost, ease of maintenance and style. Some of the more popular choices include:
- Fiberglass – The cheapest cost and lowest quality option.
- Acrylic – Acrylic offers more style variations than fiberglass but it may require professional installation.
- PVC backed decorative composite wall panels – These surrounds have the look of real stone and are DIY friendly. They offer a mid-priced alternative.
- Tile – Tile can vary a lot in price depending on the specific choice of tile and the pattern layout. The biggest drawback to this material is the maintenance of grout joints.
- Solid surface – These grout free walls are a higher priced material and are a bit heavy –which makes them more difficult to install – but they are easy to maintain.
- Granite or marble – This luxurious system is the highest price option and can be challenging to maintain.
Step 5 – Use the right accessories (or necessities) – When people think of accessories they often think of extras, or fun things. While this can be the case if you’re adding “spa-like” shower accessories (like body sprays, rain shower heads or LED lights) – it isn’t always the case in a wheelchair shower that accessories are “extras.” Items like grab bars, fold down seats, hand held showers and recessed niches – while they are thought of as accessories – can really be essential features (or necessities) in a safe and functional wheelchair shower.
What questions or experiences do you have with wheelchair accessible showers? Please comment below.
If you’re looking for more information or an estimate on remodeling a bathroom or nationwide supply of our unique wheelchair accessible shower products call The Bath Doctor in Cleveland (216-531-6085), Columbus (614-252-7294), nationwide (877-668-5888) or Cleveland Design & Remodeling (216-658-1270). Qualified Certified Aging in Place Specialists are available to help.


Mike Foti
Joe – for a barrier free shower you can either create a ‘one level room’ with the shower pan under the floor or use a solid surface or ready for tile shower pan where the barrier free pan is set on the floor. There are advantages and disadvantages to both. Feel free to call us at 877-668-5888 and I’d be glad to get into the nitty and gritty about the benefits and drawbacks to these different options. Mike
Joe Hirsch
I have a 50’s home on slab. I believe there is only gravel under the tub. My wife is adamant for tile floor and walls with barrier free entry. But I am interested in the PVC backed material for “looks”. The floor, I think, will present the most difficult challenge. Removing cast iron tub would be second. What can you suggest?