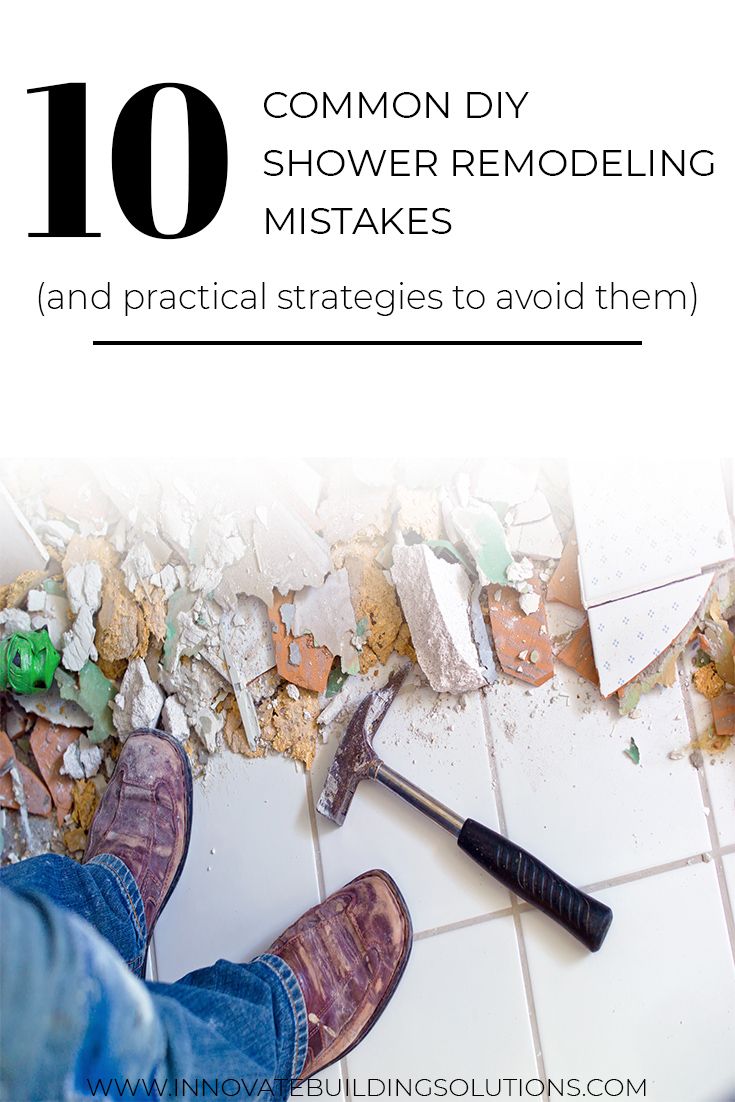
The road to a problem-filled DIY shower remodeling project is ALWAYS paved with good intentions.
You plan to save money.
You plan to design a shower which stands the test of time (and any twists and turns in your family’s lives).
You plan to add style and get rid of the nastiness which IS your shower today.
However, sometimes your plans get derailed. The DIY shower remodeling project turns into the project from H-E-double-hockey sticks (as you used to say to your kids). And here’s a few reasons why:
The remodeling job NEVER ends (which your spouse or significant ‘utter’ reminds you of CONSTANTLY).
It costs waaaay more than you thought.
You struggle to make decisions because the sea of products is overwhelming.
You make installation errors which blow up the savings you THOUGHT you were going to get.
You buy shower pans, wall panels and glass systems which don’t fit, and end up eating the cost or being socked with HUGE restock fees.
Unfortunately, the list of mistakes goes on and on and on (you get the idea). The challenge is how can you identify common shower remodeling mistakes (and the ‘School of Hard Knocks’ which went with them) others have ‘lived through’ and not repeat them on your ‘dime?’ OK – it’s way more than dimes you’ll end up losing, but you get the point.
I’ll argue the way to not suck up your savings in stupid errors is to know the common mistakes and have a game plan, so you DO NOT become the ‘victim’ of them also. And that’s why I wrote this article.
You see as a guy who leads a nationwide shower remodeling products wholesale business and sells to DIY’ers and professional contractors alike for more years than I care to admit, I’ve heard shower remodeling nightmares over and over and over. But fortunately for you there is a pattern to these problems. There are practical solutions to overcome these mistakes.
In this article I’ll point out 10 common DIY shower remodeling mistakes and give you a simple roadmap to sidestep them on your job. So, without further ado, let’s dig into the list.
Common DIY shower remodeling mistake #1 – Too many people make ‘off-base’ decisions on the shower base they choose
Shower bases (or shower pans as they’re also called) aren’t sexy. However, they’re the ‘foundation’ of your shower.
If the base fails by cracking and then leaking, you’re in deep doo-doo (that’s a technical bathroom term).
If the base has a step-over curb which is too high and one of your family members can’t get in the shower, you’re in BIG TROUBLE (as you remember your parents telling you back in the day).
If the base yellows, looks dingy or has grout joints you’re slaving over – you’re on the wrong end of a losing battle.
So – how can you make sure your shower base won’t let you down? Here’s how:
Strategies to avoid shower base problems
A long-lasting DIY shower remodel begins from the ‘bottom (‘er base) up.’ You need a shower pan which is built to last. You need a shower base which lessens maintenance hassles. Here’s a few ideas to make this happen:
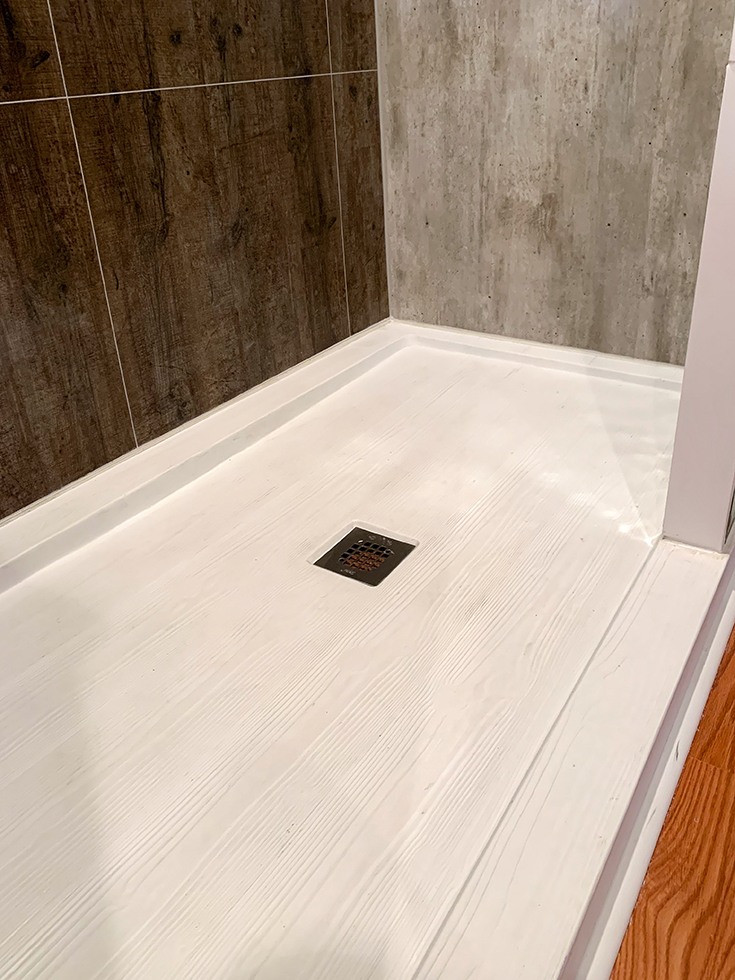
Idea 1 – If you want a tile base, get a good one which uses larger tiles – By choosing a waterproof ready for tile shower pan (or a waterproof component-based system) which uses large format tiles – you’ll eliminate leakage problems AND minimize grout joint maintenance. Please note – this IS NOT the cheapest (in the short-term at least) way to do a tile shower pan, but it will eliminate future problems.
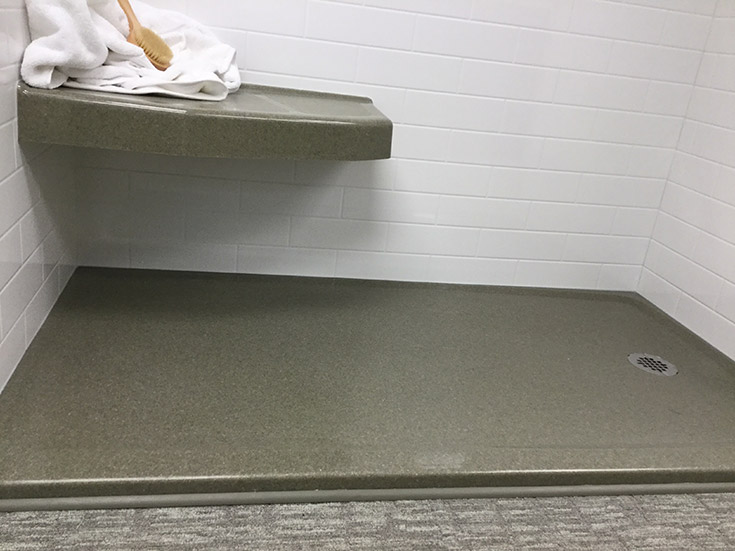
Idea 2 –Get a stone shower pan – Solid surface or cultured stone shower pans are durable as all get-out and a breeze to maintain.
Idea 3 –Use an upgraded acrylic pan for lower costs, but a decent look – If the tile pan or the stone pan are too costly, but you know the flimsy store-bought bases are also bad – a mid-cost solution is an MDF reinforced acrylic pan. They come in stylish shapes but are also durable.
Idea 4 –Get a lower curb pan which will work for the long run – Stepping over a 4” to 5” high curb is fine when you’ve got great mobility, but not so fine after a hip operation or foot surgery. Consider either a low-profile or mid-height curb so you can continue using your base for years to come, not matter how mobile you are.
Common DIY shower remodeling mistake #2 – Your job takes F-O-R-E-V-E-R to complete
Let’s face facts, shower remodeling jobs can take forever due to a lack of planning. If your project is an organized as your teenager’s bedroom you’re traveling up Schitt’s Creek (note – if you like to laugh you’ll want to check out this comedy on Netflix – and no, I’m not being paid for this endorsement – ha! Ha!) without a paddle.
The question becomes how can you stop from becoming a victim of the never-ending-shower-remodel? Here’s some ideas
Strategies to avoid the never-ending shower remodeling job
The most important thing you can do to not have a job which takes forever is to be more thorough before starting. But how, you may ask:
For one – thoroughly research products. The ‘buy as you go’ strategy will result in you being D.O.A. (Dead on Arrival).
Secondly – watch YouTube installation videos as if your life (and your time) depended on it. If the YT videos make no sense, call for help from local distributors and product manufacturers.
Lastly, read on-line reviews. What’s it going to hurt to see if people love (or hate) the product you’re looking to buy and install.
Common DIY shower remodeling mistake #3 – You buy the wrong sized materials
I can’t tell you the number of times I’ve heard this. “Mike, I’m pulling out my tub and want to convert it into a shower. I’ve measured my space. It’s 59” wide x 29” deep. I’m getting crazy-high prices because I’ve been told I’ll need a custom shower pan and wall panels.”
Since (I know) 98% of the tubs are made in standard 60” x 30” and 60” x 32” sizes, I’ll say, “I’ve got good news for you. It’s unlikely you’ll need custom products. I’ll bet money once you pull out the old tub and get down to the studs, you’ll have a standard size.”
In this case, the owner got good news. The question becomes, how do you minimize buying the wrong sized products and wasting money in the DIY shower remodeling process? Here’s a few thoughts.
How to eliminate measurement errors in the shower remodeling process
The reason I’m being fed bad measurements (for tub to shower conversions at least) is usually simple. They’re measuring inside the tile or fiberglass surround. However, the correct measurement is the ‘stud to stud’ area after the existing wall surrounds are removed.
And the best way to get measurements for your shower pan or walls is to measure after your existing materials are removed.
Common DIY shower remodeling mistake #4 – Not eliminating moisture and bacteria problems through smart product selections
Your existing tile shower has grout joints which are moldy, brownish-color and downright NASTY. So, what do most people do? Well they do the ‘logical’ (sarcasm intended) thing. They replace their old tile shower with a new tile shower. And the tile grout joint ‘battle royal’ (as they used to say in Championship Wrestling) begins again. So – why do people repeat the tile shower mistakes of their past.
Sometimes it’s because tile is the only option they know which looks stylish enough for their upgraded bathroom.
Sometimes it’s because their bathroom remodeling contractor says, “You’ve got 2 choices lady. We do tile showers or fiberglass systems. Which do you want?”
If you’re silently wondering, isn’t there a way to get a stylish shower and not have to become married to a tile scrub brush to beat back mold…you need to read on.
How to reduce the risk of bacteria and mold problems in your shower (without sacrificing style)
Your shower doesn’t need to be victimized by mold and bacteria. You CAN get a stylish grout free shower. However, you need to know which products make this goal a reality. Here’s 3 to consider.
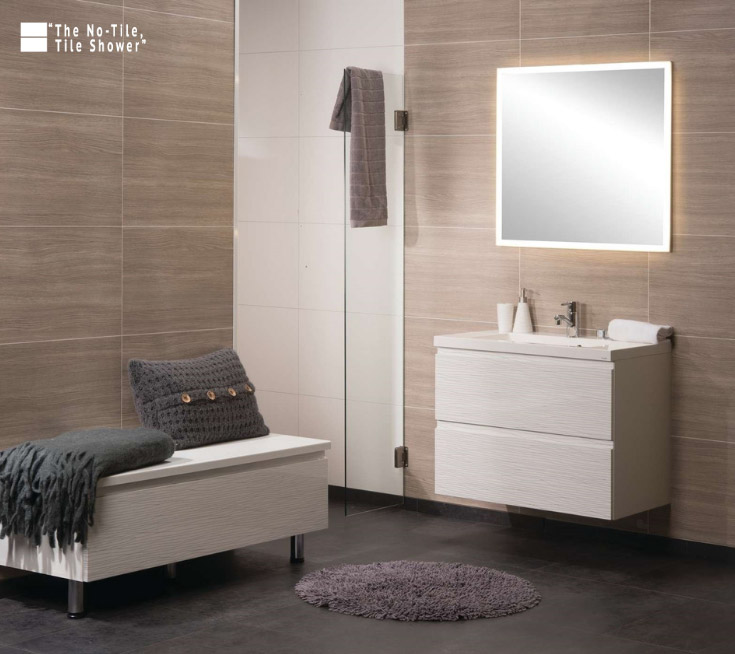
Idea 1 – Use stylish grout free wall panels – High gloss acrylic and laminate shower wall panels (which look exactly like tile, stone and cement) to make it easy to move beyond your (maintenance pain-in-the-neck) tile fetish.
Idea 2 –Install an exhaust fan – Simply said… Less Humidity = Less Bacteria.
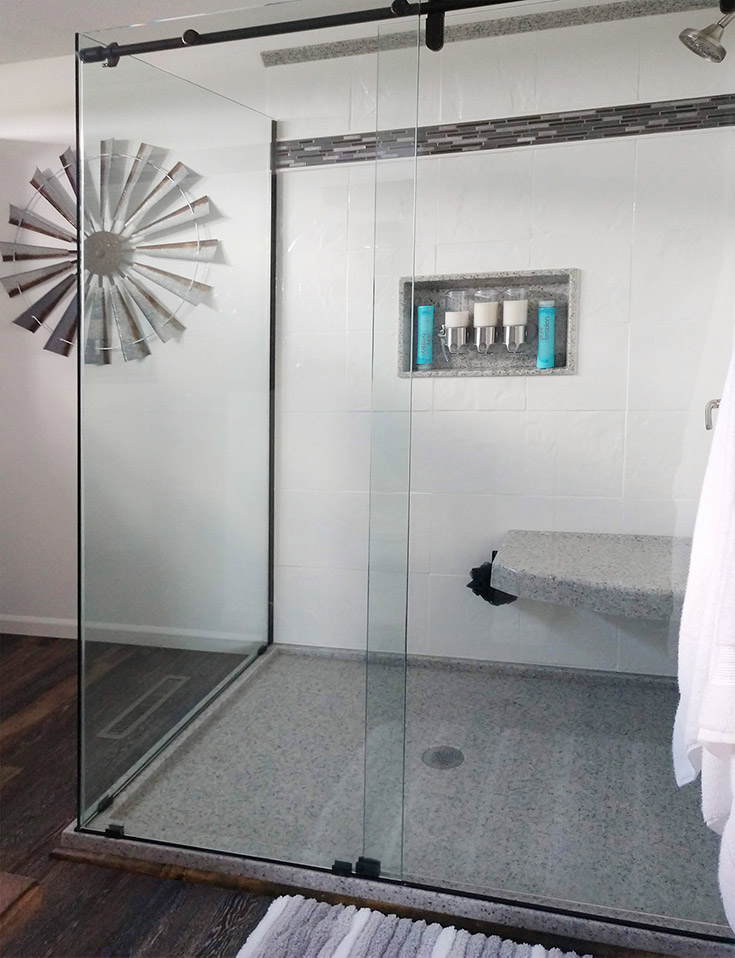
Idea 3 –Use a stone shower pan – Small mosaic tile floor tiles are a major source of dirt and mold. A solid surface pan eliminates the plethora (note – I used this fancy word to impress you, is it working?) of teeny-tiny shower pan grout joints.
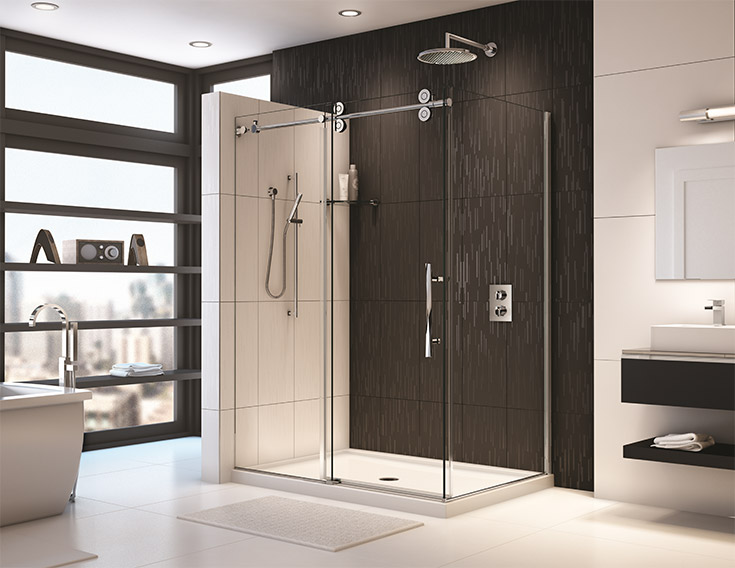
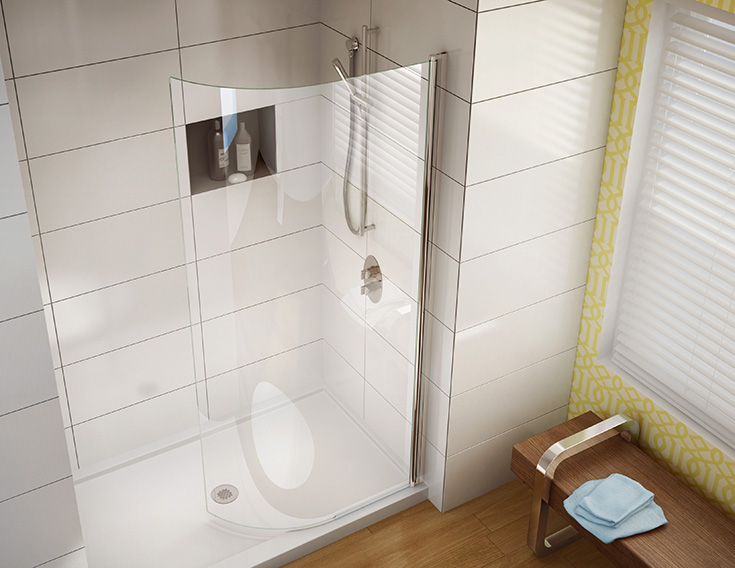
Common DIY shower remodeling mistake #5 – “You won’t want to sing, if your shower glass ain’t your thing, doo-wop, doo-wop, doo-wop.”
OK, while finding the right glass shower enclosure isn’t as entertaining as the YouTube video below of Lady Gaga ‘joining up with’ Tony Bennett singing It Don’t Mean a Thing if it Ain’t Got that Swing, it can eliminate frustrations (like the 2 big shower door problems below).
Shower door problem #1- You’ve got a pivoting door which leaves a pool of water on the floor or constantly bumps against your toilet.
Shower door problem #2 – Your flimsy, 1/8” thick framed shower door (and door tracks) are totally disgusting to clean.
Before making a final shower door selection, first step back and do one thing. Research. Research what you may ask? Well – research the types of shower doors.
For example, if you have a super-tight space and your toilet is right next to the shower, maybe a bypass sliding glass door will be best.
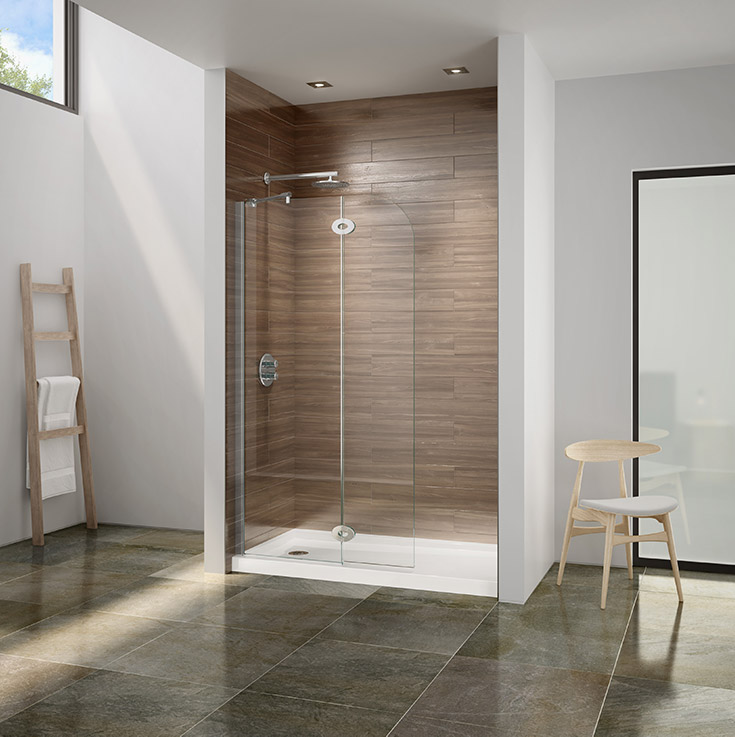
On the other hand, if you’d like a walk in shower, but also want to be able to turn the water on WITHOUT GETTING BLASTED WITH COLD WATER, a curved pivoting shower screen (like the one shown below) may be the ‘ticket’ for you.
Lastly, if you hate cleaning nasty, framed shower door tracks, a semi-frameless or completely frameless glass shower door will be perfect for you.
Common DIY shower remodeling mistake #6 – Using the wrong sealants, caulks, and grouts
Showers are wet places. OK, right now you’re probably saying sarcastically, “Mike, you’re such a genius…NOT!” But the obvious challenge with showers is water. Water creates dampness. Dampness causes mold and bacteria to grow.
Other than using solid surface materials to eliminate grout joints, what can you do to solve sealant mistakes? Read below.
How to solve sealant, caulk, and grout problems in your shower
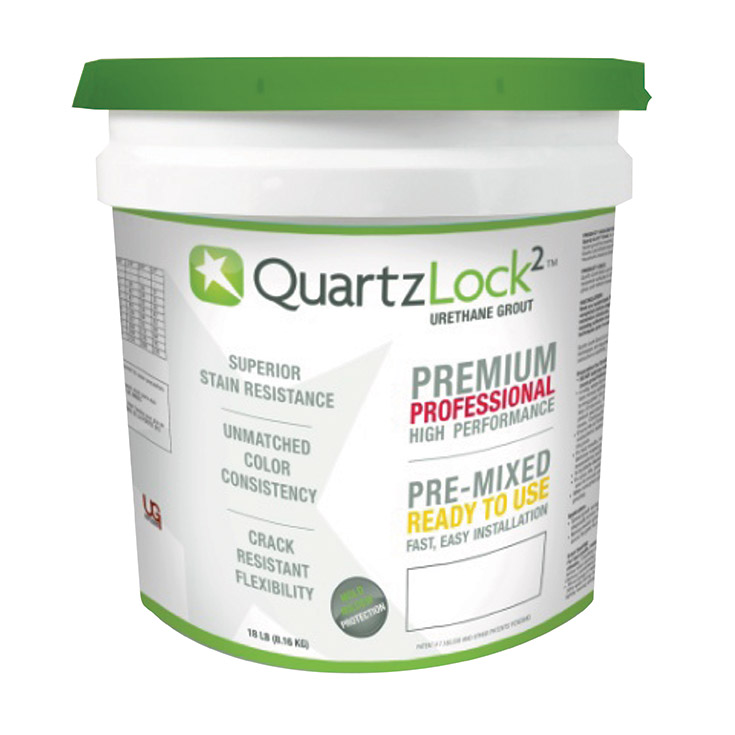
First off, don’t assume taking the quickest and cheapest installation method is the best way to solve sealant and grout problems. For example, while standard sanded grout is cost effective, simple to buy and install, urethane and epoxy grouts (which are more expensive and sometimes a pain in the butt to float in) will stand up better against Old Man Time.
Secondly, make sure you’ve got the right materials for the right job. For example, I’ve seen many people use un-sanded grout (vs. sanded grout or urethane) in their showers and end up, only months later, with cracked joints.
Here’s the bottom line. Whether you’re building a tile shower or using grout free wall panels – double-check with your manufacturer or supplier you’re using the right sealants to prevent maintenance hassles or big repair costs down the road.
Common DIY shower remodeling mistake #7 – You’re not a big enough ‘pain in the rear’
Right now, you’re likely saying, “What the heck are you talking about Mike?” Here’s what I’m saying. Most DIY projects fail due to ignorant people. And no, I don’t mean this in a negative way, because ignorance is simply a lack of knowledge. People are ignorant because (a) they don’t ask enough questions before starting the job or (b) they’re afraid to ask suppliers too many questions because they don’t want to be seen as a pain in the a**.
So, I’m here to give it to you straight. As a guy who leads a company who sells wall panels, shower pans and enclosures to DIY homeowners (and professional contractors alike), I’ll tell you some of the coolest DIY projects I’ve supplied have been to customers who ask question after question after question. So, here’s my advice to you.
How to solve the DIY lack of knowledge problem.
While all these questions can try your suppliers’ patience, these ‘anal,’ ultra-attention-to-detail people are the ones who get it right the first time. They end up with a sharp result in the end (without blowing the budget). It’s OK to be a PIA (since this is a family-friendly blog, you’ll have to fill in what the ‘A’ stands for). Do the following and you’ll come out on top:
Watch DIY installation videos for the ‘umpteenth’ time.
Call your customer service rep (yet again) to make sure you’ve got it right.
Email your shower products specialist if you’re unsure.
In short….
Don’t be afraid to be a P.I.A.!
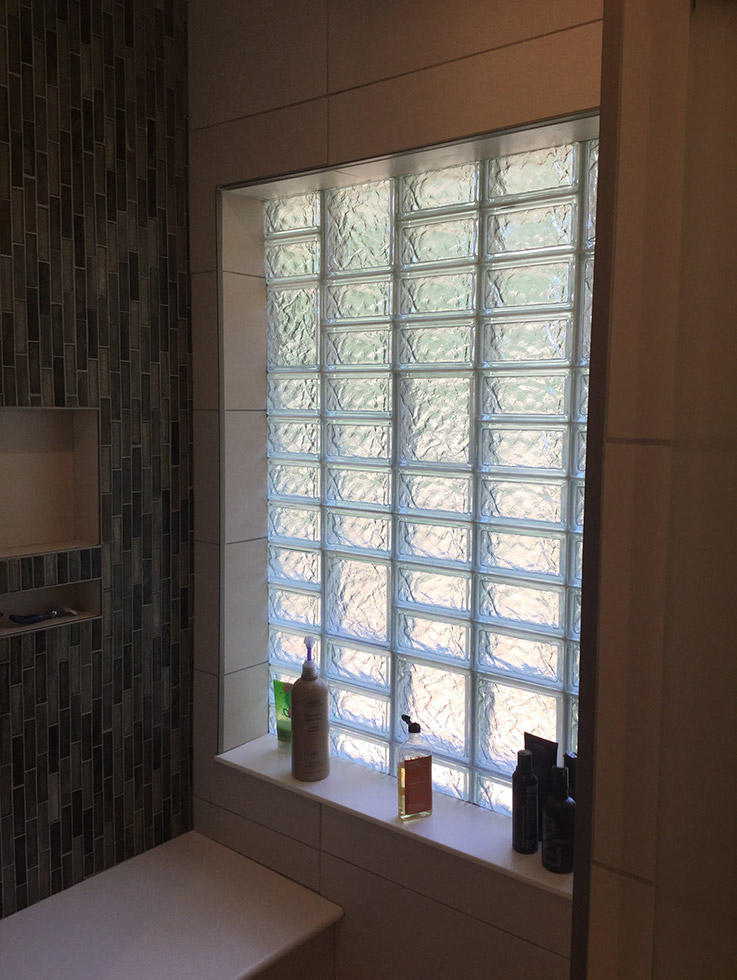
Common DIY shower remodeling mistake #8 – You don’t have a game plan for your shower window
Shower windows can be wonderful. They bring in light. If they’re able to open, they let out moisture.
However, shower windows can also be a pain. Their frames can be rotted or rusted. They can give your neighbors a peek into your ‘business’ you’d rather they not see. Also, windows to a DIY remodeler are a pain to work around. They’re such a pain some DIY’ers simple cover them over (which looks RIDICULOUS from the outside). So, how can you make your shower window an asset, not a liability? Check out these ideas.
How to make sure your shower window is a benefit, not a bust
Using the wrong shower window (let’s say one with a metal frame – which rusts, or wood frame – which rots) is a bad idea. And a window which offers you Z-E-R-O privacy and gives your pervy next-door-neighbor a show they won’t forget, is a huge problem. How can you leave these problems in the rear-view mirror and make your window ‘work’ for you? Here’s how:
Common DIY shower remodeling mistake #9 – You don’t think long and hard about the size (and type) of shower opening
Think about this problem for a moment. You built a beautiful new shower one year ago. It’s working perfectly. Then the unexpected happens. Your Mother in Law’s mobility turns south overnight. You wife says, “Assisted livin’ ain’t happenin’ for Mom.”
Your Mother in Law’s not only moving in (ready or not), but the only shower she’ll be able to use is your (practically brand new) master shower on the first floor.
You know this is the one you just built with a 5” high step over curb, and a 20” shower opening. This design WILL NOT WORK FOR YOUR MOBILITY CHALLENGED MOTHER-IN-LAW. Now what?
How to make sure your shower entry works for the short (and long) haul
Figuring out the right type of shower entry (for example, should it be a roll in, low profile curb or standard height entry) and right size (can it be 20” wide, or do you need to design it 32” to 36” for a wheelchair) isn’t as simple as it may seem.
You need to wrap your arms around curb height (from a no curb, one level wet room to 5” tall curb). You need to know the right curb width (small enough so water doesn’t gush out, but big enough to work for everyone). You need to know the best glass enclosure for who will be using the shower.
Common DIY shower remodeling mistake #10 – You forget to plan for your partner’s lotions and potions
Here’s what I’ll tell you about my shower needs. Give me 1 bottle of shampoo and 1 bar of soap (or shower gel), and I’m good to go.
For my (very pretty I might add) wife, her shower needs are not quite so simple. There’s lotions, potions, loofas, and conditioners until the cows come home (OK – maybe that’s why she’s so pretty and let’s say my looks get a grade of ‘needs improvement!). And as she’s told me before, “Mike, the time from ‘wake up to pretty’ gets longer E-V-E-R-Y year. I need my shower products!”
And this critical need for adequate shower storage often is the red-haired-stepchild of the DIY shower remodeling process. You need a shower storage plan. You don’t want to destroy your beautiful new space with an ugly dollar store plastic ‘shower caddy’ you hang over your shower head. Here’s how to plan accessories to get it right the first time.
How to plan for shower accessories
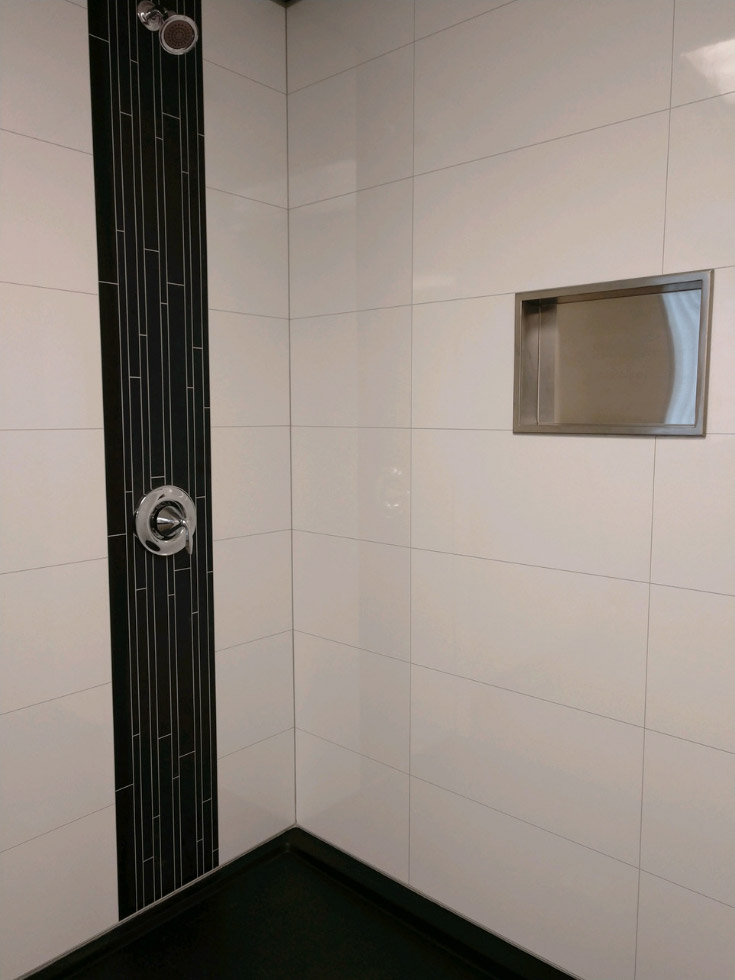
Before you build your shower determine what needs to go in it. Count how many bottles of shampoo, conditioner, loofas and razors you and your partner have. How tall and wide are they? Would a space-saving recessed niche (like you see enclosed below in this laminate wall panel system) make sense? Would it be simpler to install accessories which attach to the wall?
And last, but not least, remember this. DO NOT BUY accessories which will be a pain in your butt down the road. For example, I HATE, HATE, HATE those wire basket shelves where the soap slips through the slots time after time after time. Don’t buy this crap!
So, now that we’ve gone through the 10 common DIY shower remodeling mistakes, how can me and my team help you?
As you can see from these 10 common mistakes, a DIY shower remodeling project isn’t so simple. There’s a lot to plan. There are lots of products to consider. And there’s often more to the installation than meets the eye.
However, this is where the smart DIY’er and smart suppliers (and that’s surely what my company aims to be) jump into action.
If you need help with product choices (for shower bases, grout free wall panels, glass enclosures etc.), installation approaches or just a shoulder to cry on (but I’ll warn you we’re not the best psychologists, but we are Free), we can be reached at 877-668-5888. Click for a Free design consultation.
If you’re in the Cleveland or Akron Ohio markets and this DIY thing sounds like too much hassle for you, our Bath Doctor division can guide you through the design and do the remodeling job for you. Call 216-531-6085.
President of Innovate Building Solutions a nationwide supplier and regional (Cleveland and Columbus) remodeling contractors. Some of our product lines include glass counters, floors, backsplashes, glass blocks and grout free shower and tub wall panels
Steven – I would recommend you look for a spec sheets on both products. However, I will tell you with most flanged shower pans you should be able to use any wall panel system with the shower pan. I doubt it’ll be a problem – but you’ll want to check the spec sheet and then I’d recommend calling customer service at Dream Line and ask, “Can I use any type of shower surround panel with your pan?” I would think the answer to this will be yes. Good luck (and if you haven’t already bought the Sterling panels – and would like something nicer, I’d check out these laminate wall panels. They’re not molded like the Sterling units – and are thicker and more realistic. Good luck with your project – now here’s the link – Mike – https://innovatebuildingsolutions.com/product/laminate-diy-shower-bathroom-wall-panels/
Steven Enos
I am trying to find out if I can install sterling medley 3 PCs. Walls on a Dream line low profile/threshold? I can’t find a close up picture of the products. Thanks
Eddie – thanks for your nice comments. I just sent an email to our Digital Marketing Agency to see if he can send you this download directly and see if there is something ‘glitchy’ going on we need to fix. Thanks for taking the time to bring it to our attention. If you need anything else, feel free to reach out to me or one of our team at 877-668-5888. Mike
Eddie H Sills
Hi, Mike
Great article…
I was trying to download the Ultimate Bathroom Remodeling Guide but the link does not work…
Janelle – there is a product one of our manufacturers recommends in a case like this which is called ‘Slip Doctor Clear Acrylic Non-Slip Spray.’ It is intended for wet areas. It may however need to be reapplied over time. If you have and additional questions feel free to call me at 877-668-5888 and ask for Mike
I hope this message finds you well! I am an Interior Designer and have an issue with one of the shower bases that we purchased for a client. The shower base is the Kohler Rely 60″x32″ shower base (K-8458-0). Our client is in her 80’s and stated that she has to brace herself while stepping in as the shower floor is quite slippery. We provided grab bars, however she is still uncomfortable to step onto the shower base. I spoke with a Kohler representative even before purchasing the item, and they advised that the shower had a textured surface to prevent slipping. I spoke with another representative today, and she advised that they do not have any additive to apply onto the surface of the shower floor. Do you have any other suggestions for our issue? Our client mentioned that she does not want to use a non-slip mat as she has used them before and has experienced a tough time cleaning the mildew off of them. Ultimately, she wants to keep the shower base, however needs it to be safe enough for her to use.
Please let me know your thoughts. Thank you in advance for your assistance!
Best regards,
Janelle Disario
Konni Tanaka Design Group


")

")


Mike Foti
Steven – I would recommend you look for a spec sheets on both products. However, I will tell you with most flanged shower pans you should be able to use any wall panel system with the shower pan. I doubt it’ll be a problem – but you’ll want to check the spec sheet and then I’d recommend calling customer service at Dream Line and ask, “Can I use any type of shower surround panel with your pan?” I would think the answer to this will be yes. Good luck (and if you haven’t already bought the Sterling panels – and would like something nicer, I’d check out these laminate wall panels. They’re not molded like the Sterling units – and are thicker and more realistic. Good luck with your project – now here’s the link – Mike – https://innovatebuildingsolutions.com/product/laminate-diy-shower-bathroom-wall-panels/
Steven Enos
I am trying to find out if I can install sterling medley 3 PCs. Walls on a Dream line low profile/threshold? I can’t find a close up picture of the products. Thanks
Mike Foti
Eddie – thanks for your nice comments. I just sent an email to our Digital Marketing Agency to see if he can send you this download directly and see if there is something ‘glitchy’ going on we need to fix. Thanks for taking the time to bring it to our attention. If you need anything else, feel free to reach out to me or one of our team at 877-668-5888. Mike
Eddie H Sills
Hi, Mike
Great article…
I was trying to download the Ultimate Bathroom Remodeling Guide but the link does not work…
Thank you, Eddie
Mike Foti
Janelle – there is a product one of our manufacturers recommends in a case like this which is called ‘Slip Doctor Clear Acrylic Non-Slip Spray.’ It is intended for wet areas. It may however need to be reapplied over time. If you have and additional questions feel free to call me at 877-668-5888 and ask for Mike
Janelle Disario
Hi Mike,
I hope this message finds you well! I am an Interior Designer and have an issue with one of the shower bases that we purchased for a client. The shower base is the Kohler Rely 60″x32″ shower base (K-8458-0). Our client is in her 80’s and stated that she has to brace herself while stepping in as the shower floor is quite slippery. We provided grab bars, however she is still uncomfortable to step onto the shower base. I spoke with a Kohler representative even before purchasing the item, and they advised that the shower had a textured surface to prevent slipping. I spoke with another representative today, and she advised that they do not have any additive to apply onto the surface of the shower floor. Do you have any other suggestions for our issue? Our client mentioned that she does not want to use a non-slip mat as she has used them before and has experienced a tough time cleaning the mildew off of them. Ultimately, she wants to keep the shower base, however needs it to be safe enough for her to use.
Please let me know your thoughts. Thank you in advance for your assistance!
Best regards,
Janelle Disario
Konni Tanaka Design Group