So, you watched the installation video where your favorite line of bathtub or shower wall panels are being installed. The guy or gal leading you through the steps makes it look soooo easy! You think to yourself, “I’m ready to do this job.”
Then the fateful day comes for you (or your contractor) to get started.
Then the questions start (literally) blowing your mind.
You feverishly go back to the uber-quick installation video searching for answers to your myriad (a fancy word I threw in to make you think I’m smart, hope it’s working!) of questions. And now…
The panic sets in!
And here’s a fact you can take to the bank. No remodeling project is as simple to do as it is as after you’ve ‘been around the block’ a few times. And when you get advice from someone who has ‘been-there, done-that’ you know logically will save you time, money and most importantly AGG-RA-VATION! And now (as you’re getting ready to start this job) you’re hoping and wishing this experienced person will magically appear at your home.
And your spouse is not making things easier chirping in your ear, saying they hope this is not another remodeling project which has gone south! They’ll literally do anything (and I mean anything) to make the project go better to stop you from being so crabby during the process.
And as a company who created one of those ‘uber-quick’ (laminate wall panel) installation videos a few years ago – I knew my company needed a more comprehensive video to answer the many questions we get from homeowners and contractors who use laminate wall panels for the first time. We needed a longer video which answered more questions customers (who haven’t installed Fibo wall panels before) need to know on how to do the job.
You see in this video Jeff Spurio (our Sales Manager) and I peppered Rob Klinc (our Vice President of Operations – and guy who leads our installation crews) with questions you’ve been asking about the installation of Fibo laminate shower panels. And you may be wondering was Rob loving this ‘interrogation’ from Jeff and me? ‘Er, that would be negative, Houston!
However, Rob put up with us. He survived our questions and in the process has answered A LOT of the questions we get from you!
In this article, I’ll outline your frequently asked questions about installing laminate wall panels. In addition, I’ll identify the specific spots in this video where you can find the answers. And since bathtub or shower wall panels are often the ‘focal point’ to create the stylish, yet low-maintenance alcove bathtub or shower you want, we know how important it is to get the installation right the first time!
At the end, let me know how well this video has answered your questions, and/or other concerns you have we left unsaid. I want to make this blog post (and educational video) as comprehensive as possible.
Part I – Questions about tools, storage and materials required to install Fibo laminate wall panels
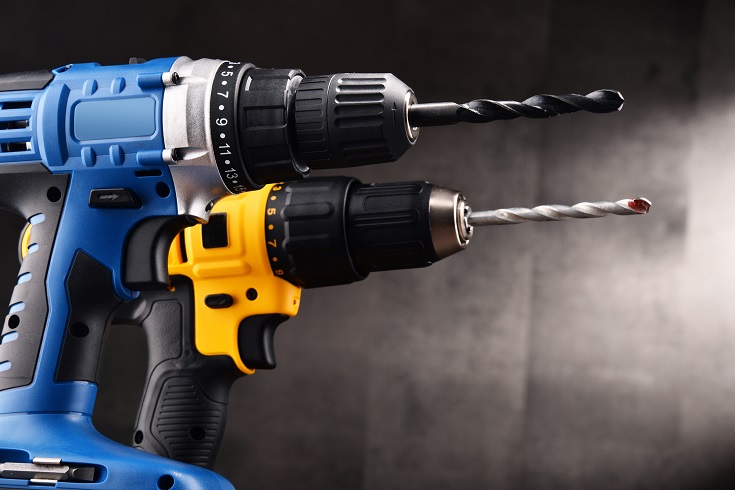
What tools are needed to install Fibo laminate shower and bathtub panels? (0:58)
The main tools needed are 2’ and 4’ levels, an impact driver or screwdriver, a hole saw and either a track saw or a circular saw to cut the panels.
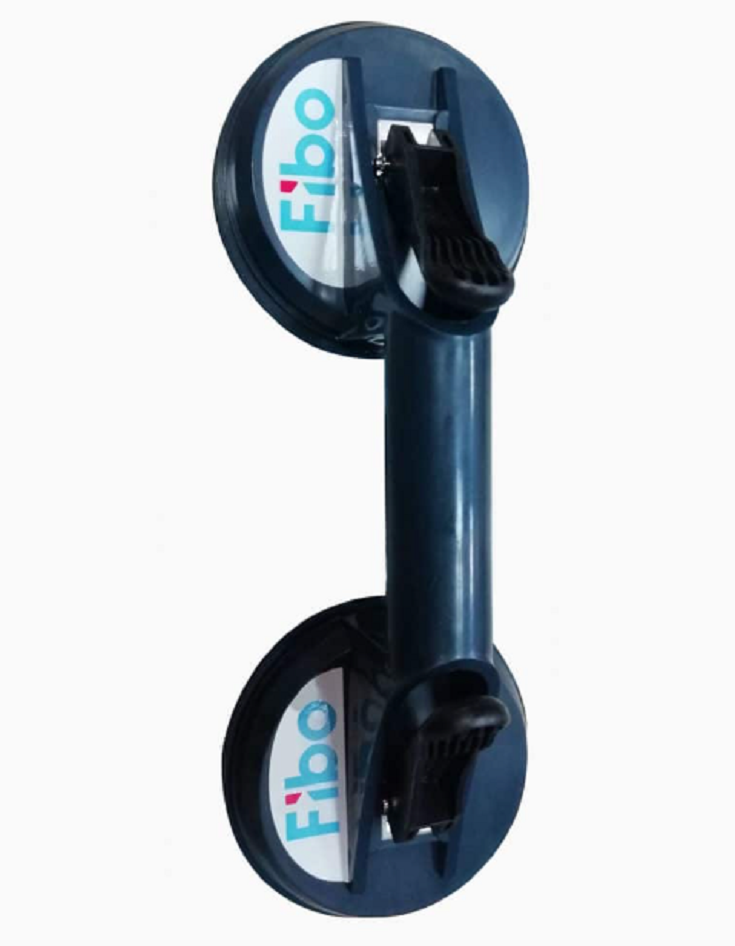
Is there a good tool to use to work with these wall panels? (1:42)
Especially when working with laminate panels without faux grout joints or those patterns with larger tile or stone patterns, a set of Fibo grips (which look like the tool used by glass installers) makes it simpler to join the panels and move them from spot to spot.
How should you store the laminate shower and bathtub wall panels? (2:06)
It’s recommended to store laminate wall panels flat, so they don’t bow. In addition, just like laminate flooring – with laminate wall panels you want to get the material acclimated to the temperature of your home. Bring them inside 48 to 72 hours before the installation.
What comes in a standard Fibo shower and bathtub wall panel kit from Innovate Building Solutions? (2:48)
In the kit you’ll get everything you need so you’re not trying to find products at a home center which may (or may not) be the correct materials for a proper installation. So, with the kit – the largest item are the wall panels (which are 23.6” x 94.4”).
In addition to the wall panels, you’ll also get:
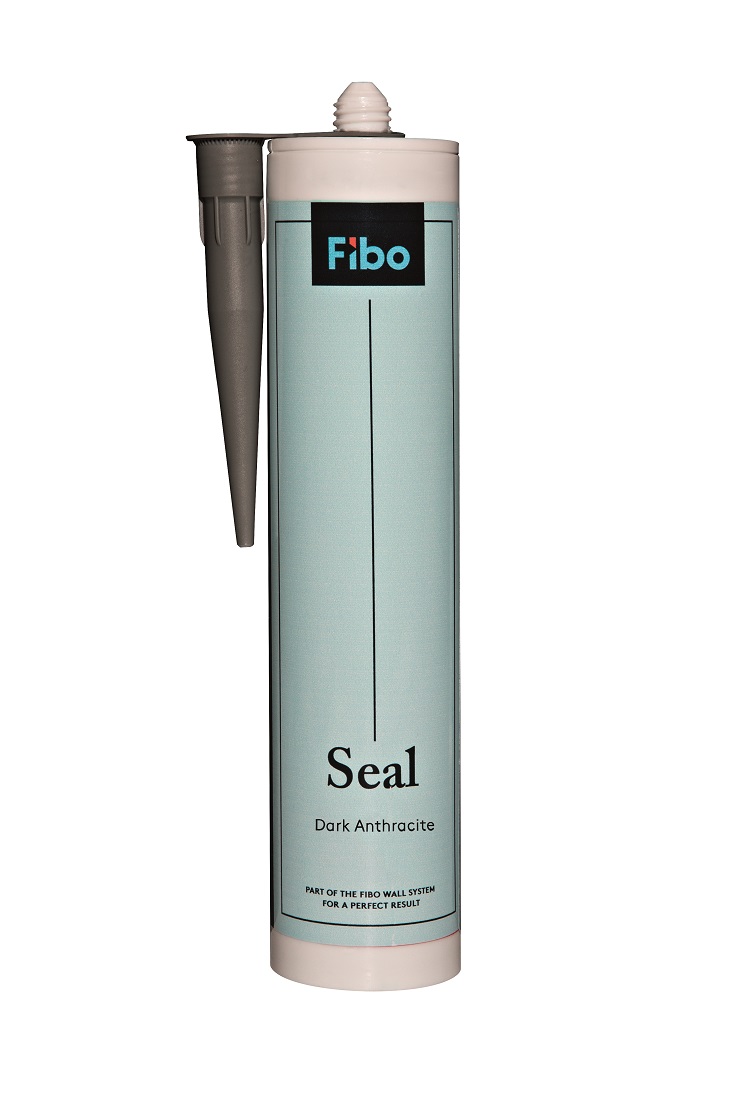
Fibo sealant (gray or white depending on the grout joint of the panels)
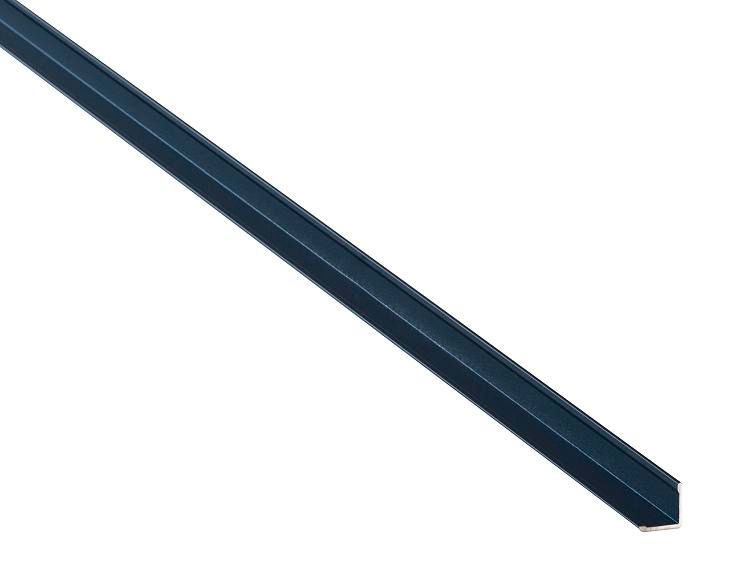
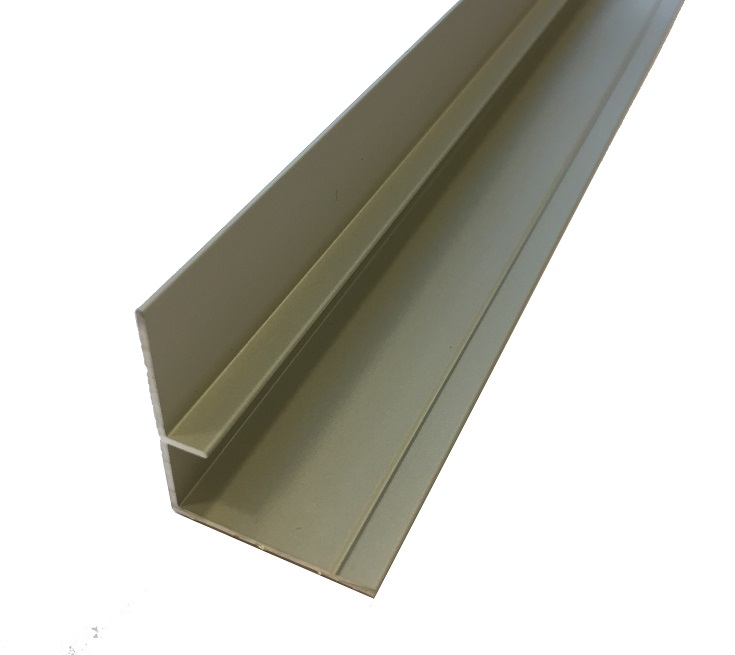
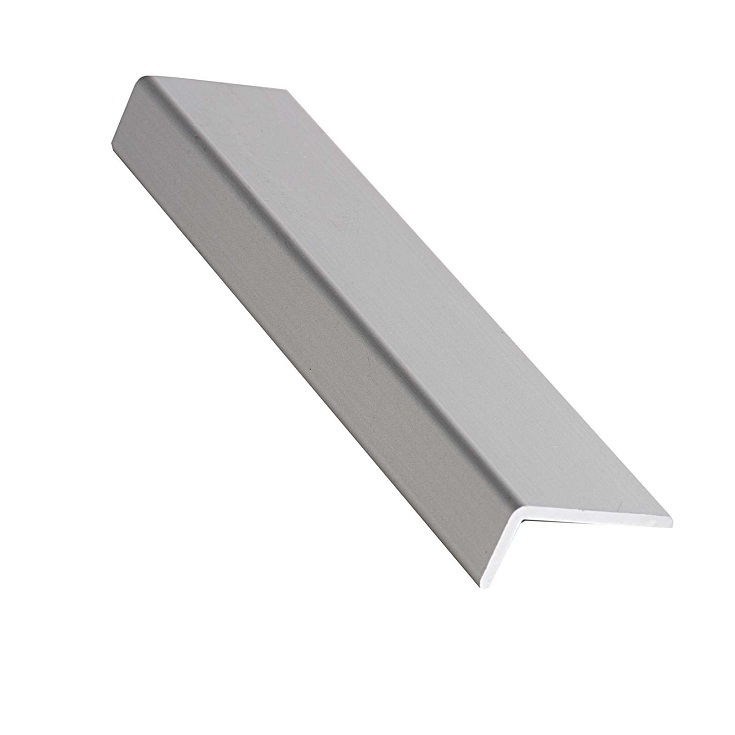
Trim profiles. You’ll get large L profiles for the top of the wall, small L profiles for the side walls, ‘base profiles’ used between the bottom of the panels and the tub deck or shower pan, and hidden insider corner profiles.
Rubber finishing tool. The finishing tool is used to wipe off the sealant which oozes out when you click and lock the panels together and to create smooth joints in the corners and around the base profiles.
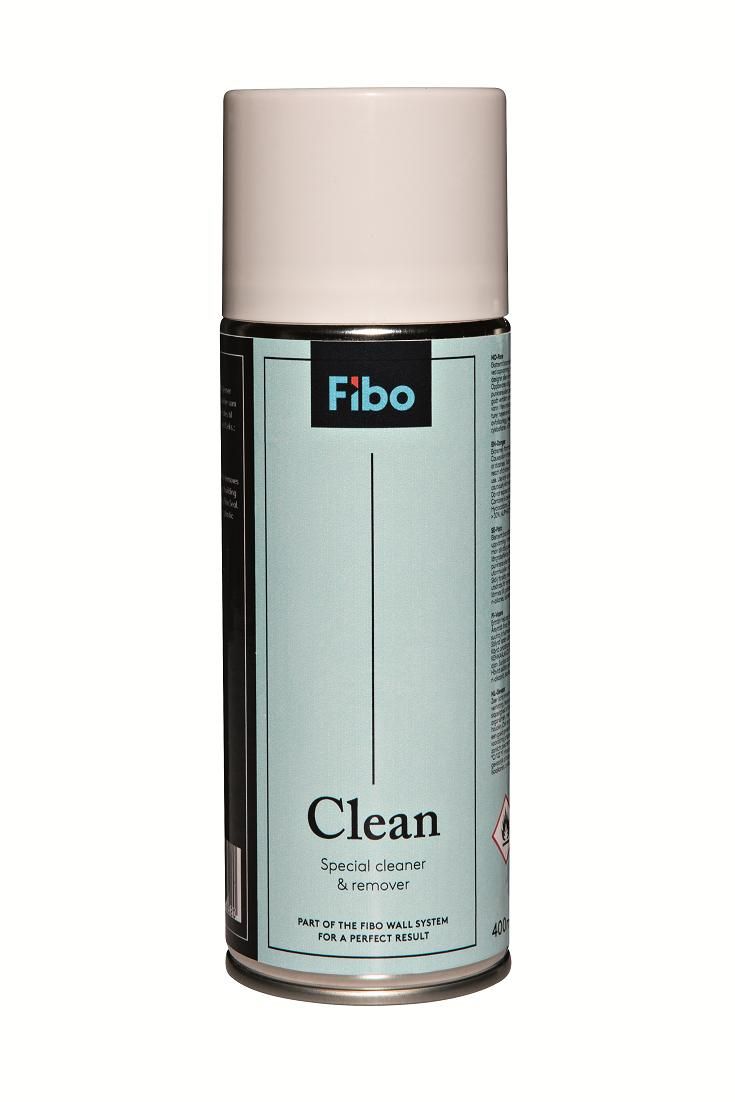
Spray. The spray is used on the sealant to make it simple to remove from the panels.
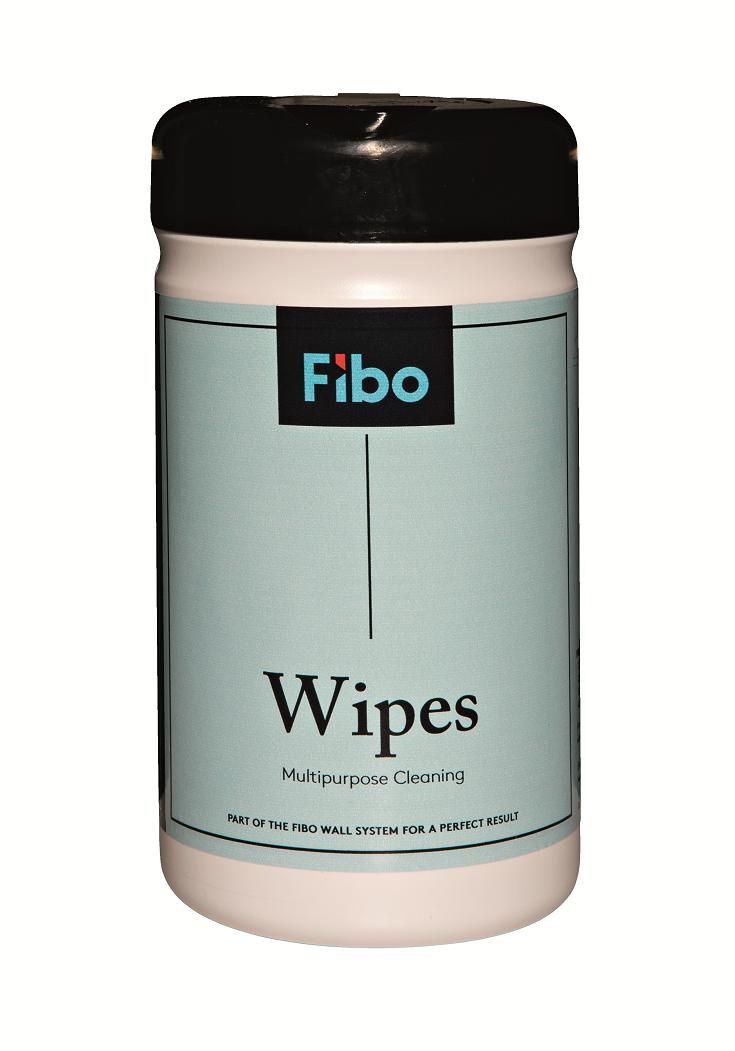
Wipes. The wipes are used to clean off excess sealant.
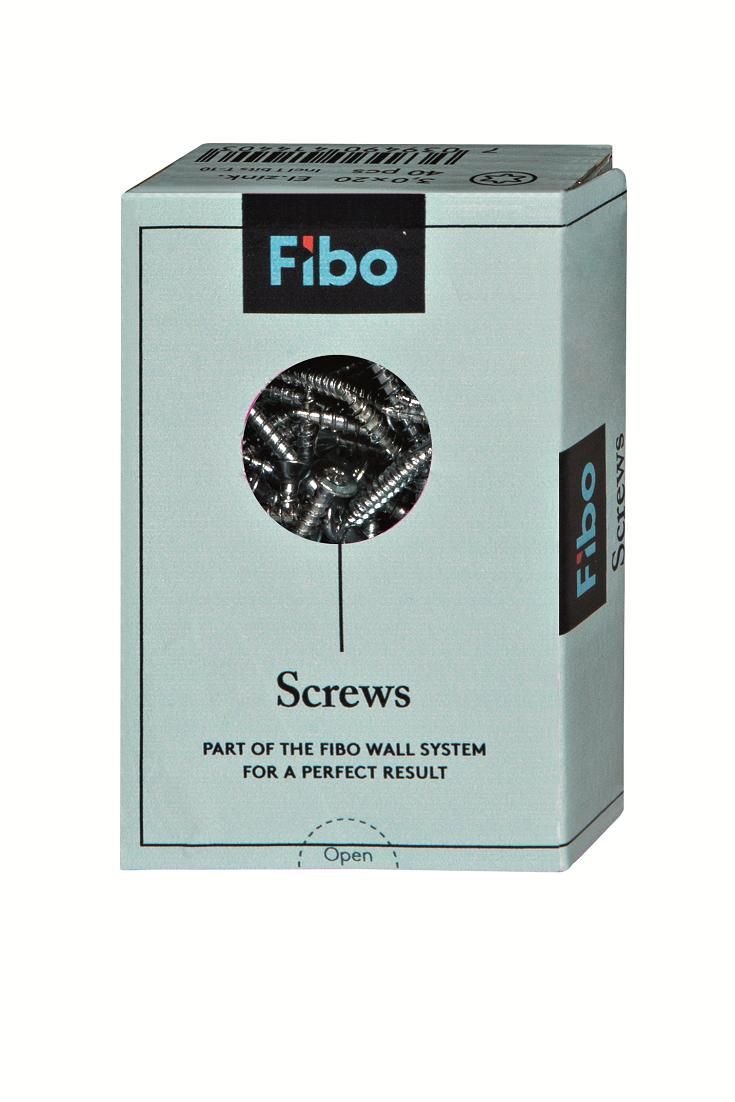
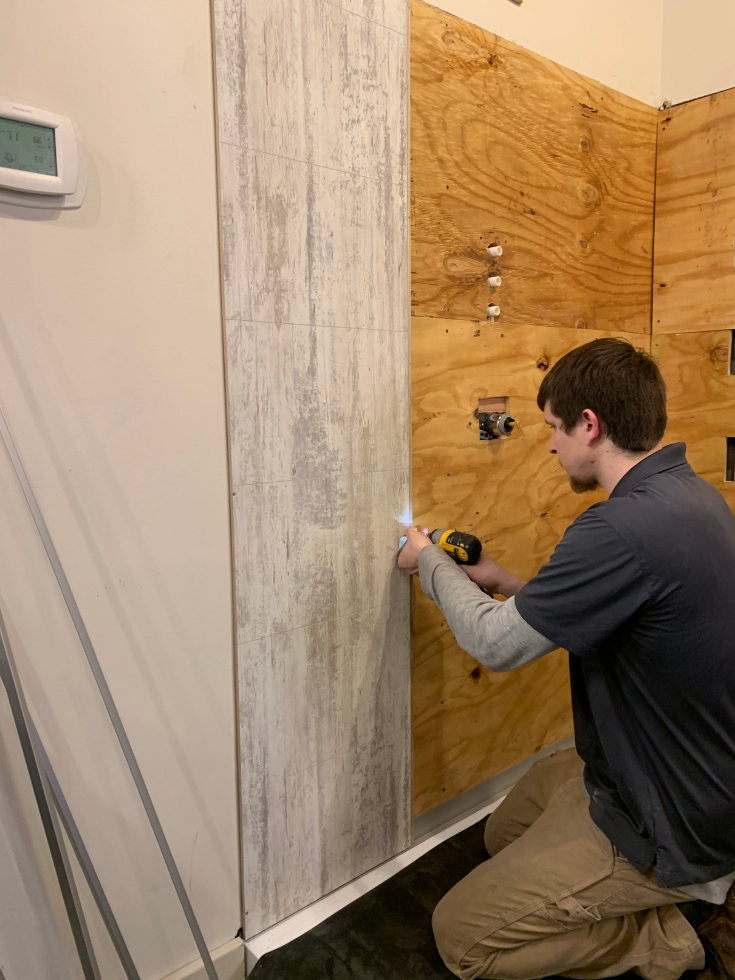
Screws. The screws are used inside the groove of the wall panels to tie them into the OSB backer board. Note – the screws are not seen after the panels are clicked and locked together.
Part II – What prep work do you need to do before installing your Fibo laminate shower and bathtub panels?
Prep Question #1) What needs to be done before installing the laminate wall panels in a shower or bath surround? (3:20)
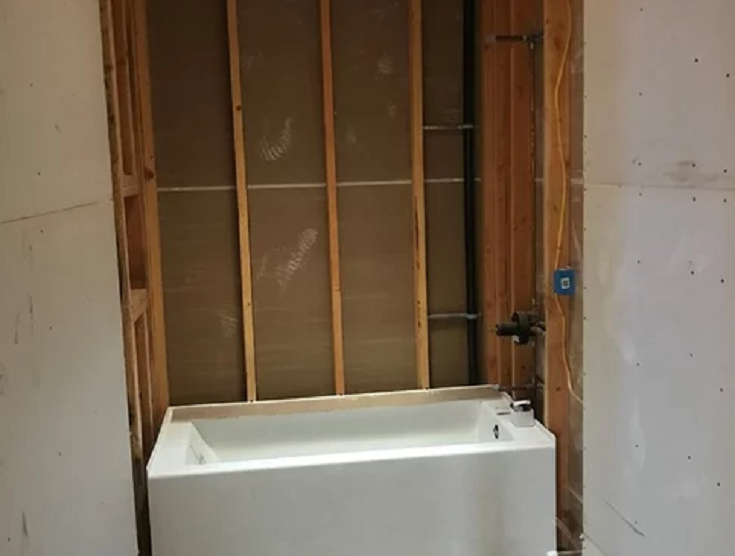
Before putting in the shower panels – the shower base needs to be installed. And if you’re doing a bathtub surround, the alcove bathtub needs to be put in.
Prep Question #2) Why does the shower pan or bathtub need to be installed first? (3:44)
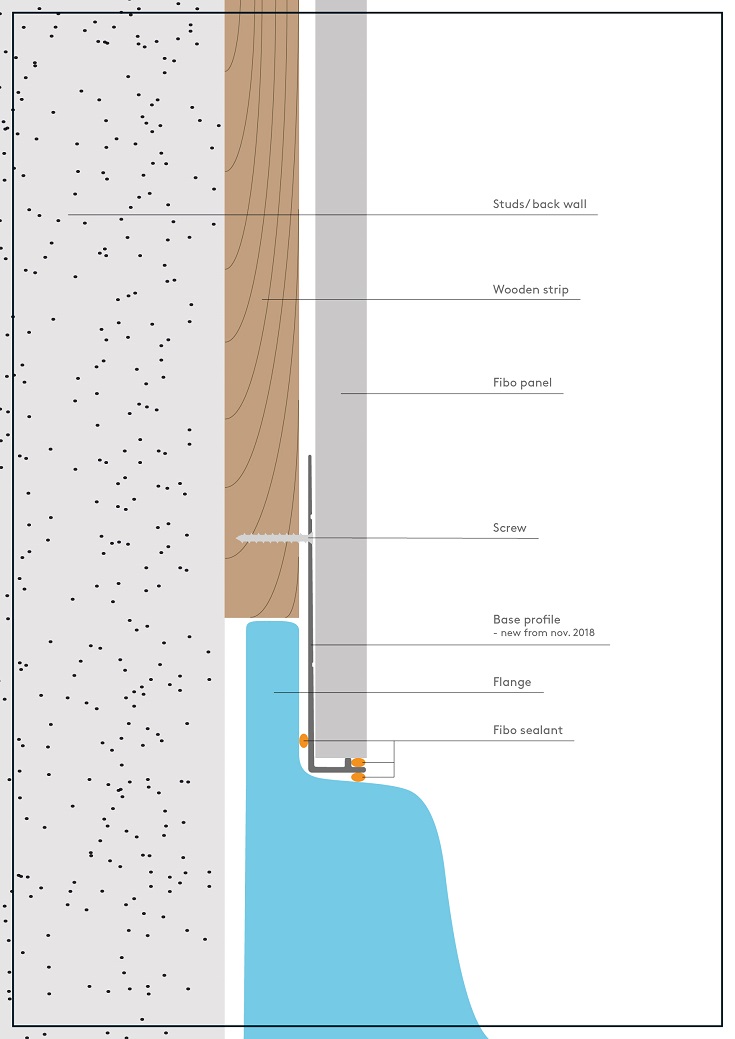
The key to any wall panel installation is to make sure water won’t wick behind the wall panels or get under the base or tub. That’s why the shower pan or tub is put in and the Fibo wall panels are set onto the ‘base profile.’ Then the waterproof sealant is put behind the base profile and between the base profile and the OSB (Oriented Strand Board backer board for the panels). See the diagram below.
Prep Question #3) What’s the right backer board to use with a Fibo tub or shower installation? (4:03)
Although many people think they should use moisture resistant greenboard or cement board behind these wall panels this IS NOT correct!
It’s best to use OSB (Oriented Strand Board) or plywood. The reason you want to use a wood backer board is because the screws will bite in better to the wood than into drywall or cement board. It’s also smart to use full sheets of OSB because it’ll make it easier to mount grab bars, seats, and other accessories, even years after the panels were installed.
Prep Question #4) What’s the first step to get this installation started in a bath remodel? (4:37)
The first step is demo and removing the old materials.
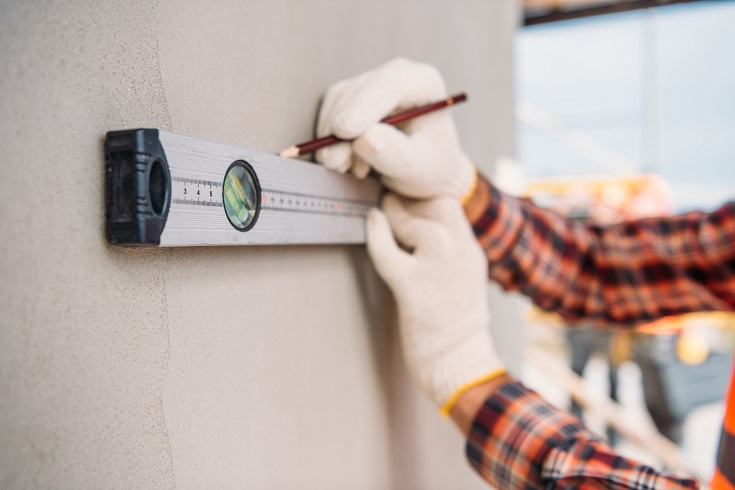
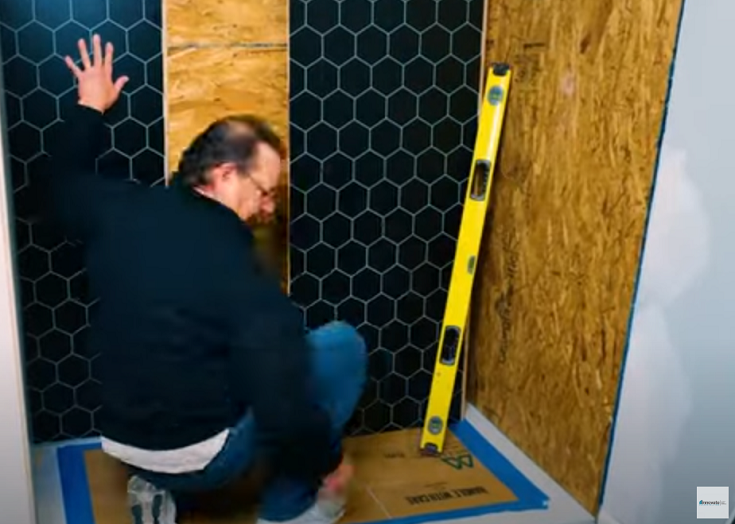
Prep Question #5) How do you work with existing walls which aren’t plumb for a laminate shower or bathtub installation? (5:08)
Oh, to have a ‘perfect home’ to install in. If yours isn’t that home (and few are), you’ll want to know how to work with walls which aren’t plumb.
Rob recommends if you have a bow in the studs (a stud which sticks out) you plane it down. And if you have a belly (a stud is recessed) you shim it out.
Prep Question #6) Is it OK to go over old tile in a bathroom with the laminate wall panels? (5:22)
While it’s possible to go over old tile, it’s not recommended since there could be moisture behind an old tile wall which will get trapped inside if you cover them over with a grout free wall panel system. And when moisture is trapped between the wall panels and old tile, mold can grow between these surfaces which will result in needing to remove the entire system. That’s an expense you’ll want to avoid!
Don’t be ‘penny-wise and pound-foolish’ as my dad used to say. Get rid of the old tile so you know you’ll have a fresh, mold-free backer board system behind the panels.
Part III – Questions about installing Fibo laminate shower and bathtub panels?
So, the day has finally arrived and you’re ready to begin the wall panel installation. So, where do you begin? Well – we’ll start with step 1 (installing the base profile) and discuss the steps beyond there.
What’s the base profile and what are the keys to installing it? (5:45)
The base profile is the aluminum part used between the bottom of the wall panels and your shower pan, tub deck or shower floor (in the case of a one level wet room system).
It’s important to install this profile level and place it 1/8” above the shower pan, tub deck or shower floor (in a barrier free shower installation).
When is the base profile installed? (6:30)
This part is installed after the shower pan (or alcove tub) and OSB (backer board) are in place.
Why do you recommend using the full sheets of OSB vs. the OSB strips? (6:41)
While either option is OK, Rob (and Innovate Building Solutions wall panel installers) recommends full sheets of OSB because it makes it easier to screw in anywhere, it provides better sound deadening, and you can hang accessories anywhere.
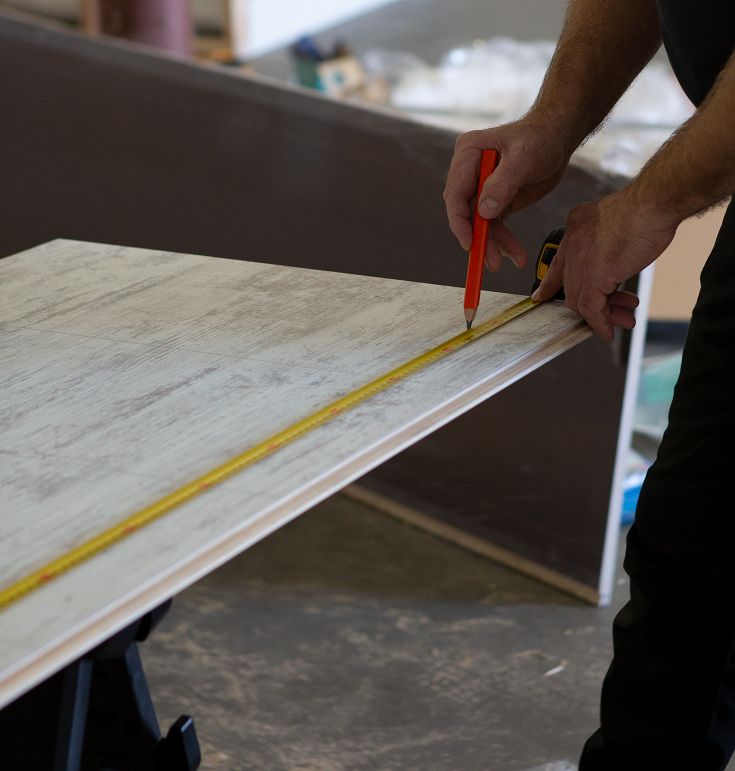
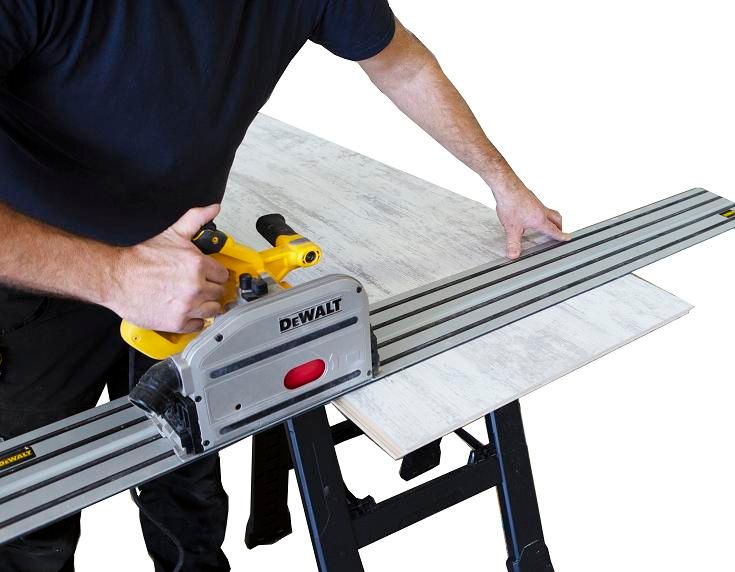
How do you measure and the cut the panels? How do figure out the layout to make sure the finished laminate shower or tub walls look symmetrical? (7:20)
It’s recommended to make the finished faux tiles symmetrical to not drive the O.C.D. people in your home nuts. So, if you have a 36” side wall – take the 2 (23.6” wide) panels and make each panel 18” wide so the faux tiles look the same. It is OK functionally to have the panels not be consistent in size, although most people don’t like the look of a system with different sized faux tiles.
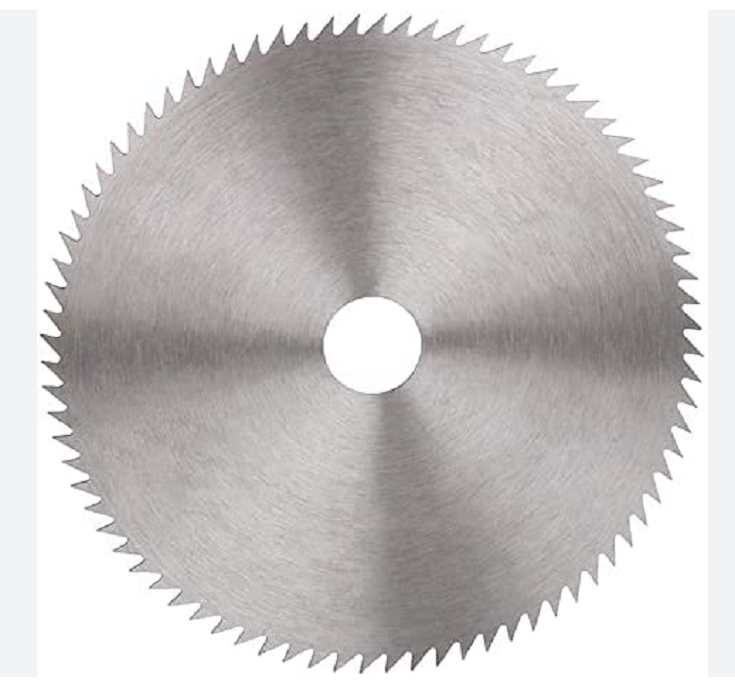
What blade should you use to cut the laminate panels? (8:01)
A fine tooth wood blade is best.
What do you do if the 94.4” high standard laminate wall panels are taller than your ceiling height? (8:28)
When the standard wall panels are taller than your ceiling, it’s recommended to cut off the top (not off the bottom of the panels), so it makes it simple to line up any faux grout joints in the panels.
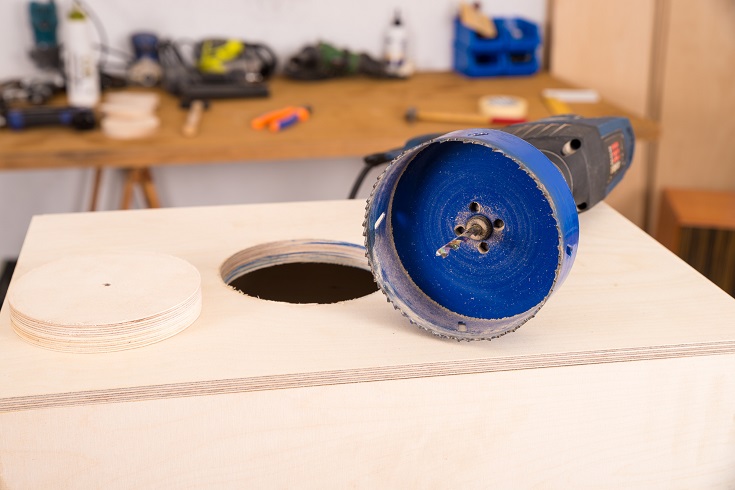
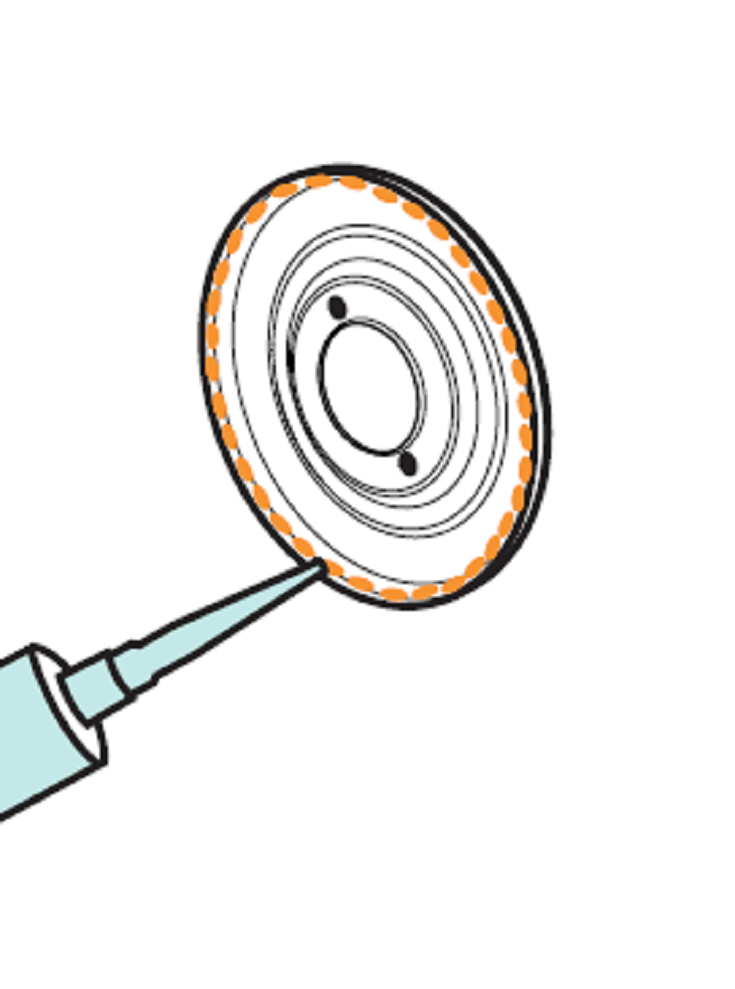
How do you make the holes for the shower valve and shower head in the laminate wall panels? How do you seal around these holes? (9:00)
Make the holes for the shower valve/head with a hole saw with a fine tooth blade. Seal around these cuts with the Fibo sealant.
On which wall should you begin installing the Fibo wall panels? How do you need to cut and prepare this panel? (9:12)
Start the Fibo bathtub or shower panel installation on the left side. Cut off the outside left edge of the panel (to make a flat edge), seal the bottom of the panel (which rests on the base profile) and screw in the right (groove) side.
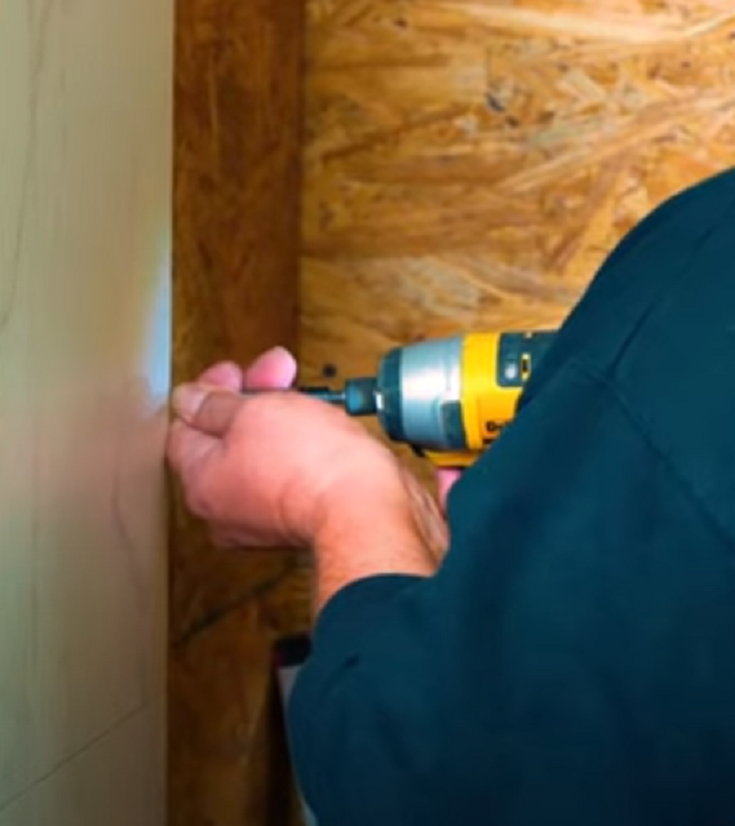
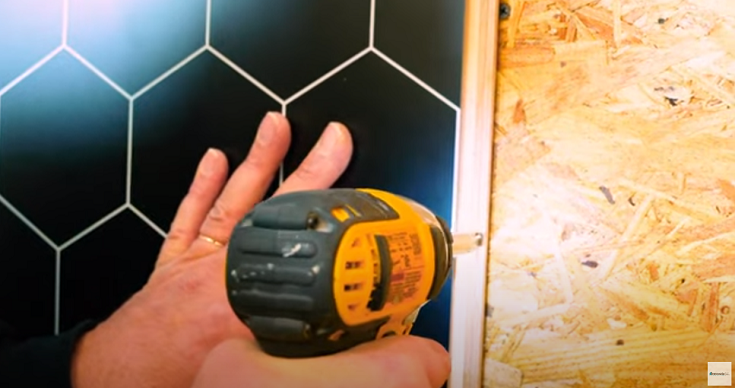
How many screws should you use in the groove of each panel? (10:15)
Use 4 to 5 screws per panel – 18” to 24” apart.
How do you measure the panel which is installed into the internal corners? (10:26)
Measure from the inside of the internal corner to the left panel to determine the finish size for your next panel.
How do you attach the wall panel to the hidden insider corner profile? (10:54)
The panel is attached with a double sided tape which is factory applied to the hidden inside corner profile.
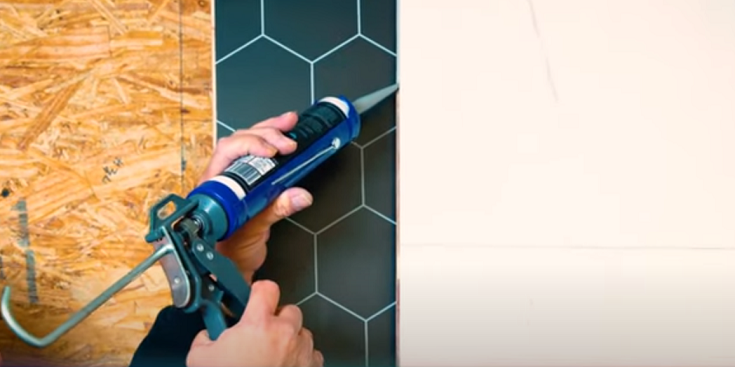
Where do you apply the hybrid polymer sealant between these panels? How thick should the sealant be? (11:15)
The sealant should on the tongue side of the 2nd panel. Use a 1/8” thick bead. Too much sealant will make it harder to join panels together and is not needed to make the installation 100% waterproof. More sealant IS NOT better!
How do you click and lock the laminate wall panels together? (11:48)
Put the panels together at an angle and work them back and forth until they seat together. Also notice – your sealant should be oozing out between the panels after they are clicked and locked together.
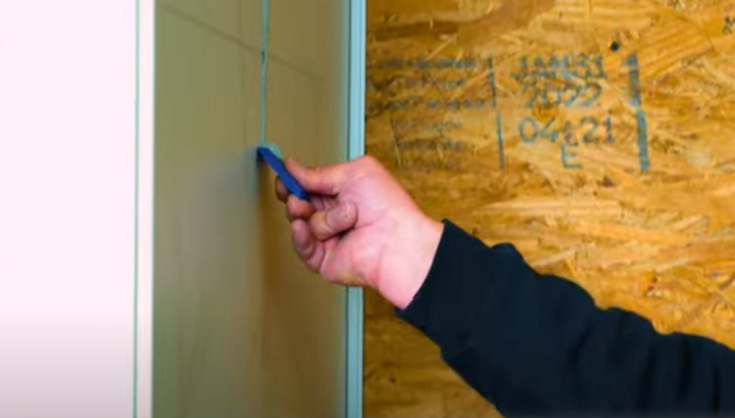
How do clean the sealant which has oozed out between the tub or shower panels? (12:17)
Spray the sealant which has oozed out between the panels.
Clean off the sealant with the rubber finishing tool.
Use the cleaning wipes to take off any residue.
The sealant should be removed within 45 minutes after the panel is installed.
How do you install the second wall? (13:18)
Put sealant inside the inside corner profile and base profile. Cut off the tongue of the panel going into the corner and screw the groove (on the right side of the panel) onto the second wall. Then add sealant to the tongue of the panel to the right of it and click and lock the panels together. Continue this process until your wall is fully covered.
What can you do if you’re having a hard time getting the Fibo wall panels to click and lock together? (14:24)
To get the panels to click together do the following:
Wiggle the panel back and forth at an angle and ‘work’ them together.
Make sure there’s not too much sealant (a 1/8” bead is recommended).
Make sure the sealant is on the correct side of the panel (on the tongue of the panel to the right when you’re joining them).
If there’s a bow in the studs or OSB – plane this surface flat or shim it out if there’s a belly.
What’s the right way to screw the Fibo bathtub and shower wall panels in? (15:11)
Make sure the Fibo wall panels are flush to the OSB or plywood backer board.
How do you finish the outside edges of the Fibo wall panels? (15:50)
Put sealant inside the small L profile and apply it to the edge of the Fibo panel(s). Clean off any excess sealant with the wipes provided in the kit.
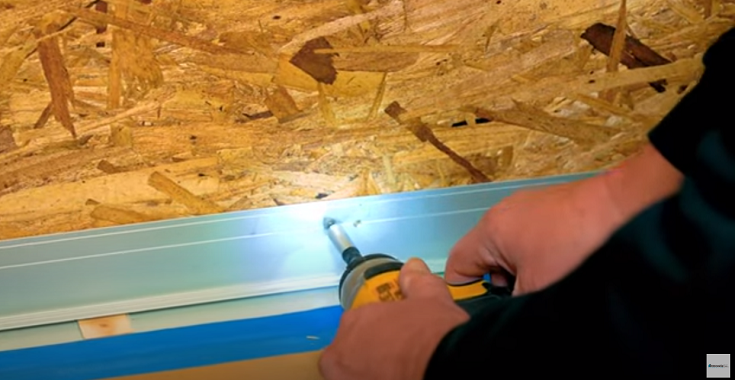
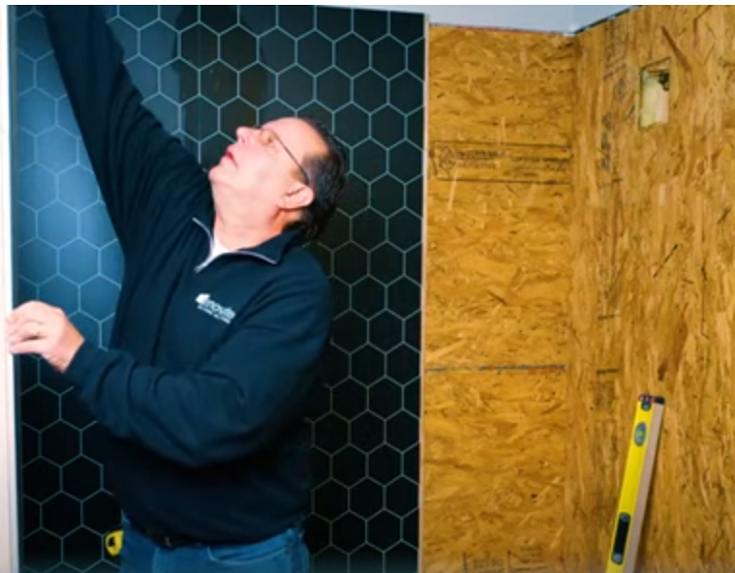
How do you finish the top edge of the Fibo wall panels? (16:33)
Put sealant inside the ‘long L’ profile and place it onto the Fibo panels. Put the ‘long side’ of the long L profile onto the face of the wall panel so it can cover any ceiling height or cut variations. Clean off excess sealant with wipes provided in the kit.
How can I learn more about the Fibo wall panel installation and/or get samples?
To learn more about nationwide supply of Fibo wall panels (and/or get a copy of the ‘Product Installation Guide’) call 877-668-5888 and/or click for a Free Estimate. For a local installation of these panels in Cleveland and Akron Ohio call The Bath Doctor at 216-658-1270.
President of Innovate Building Solutions a nationwide supplier and regional (Cleveland and Columbus) remodeling contractors. Some of our product lines include glass counters, floors, backsplashes, glass blocks and grout free shower and tub wall panels


")
")


")
