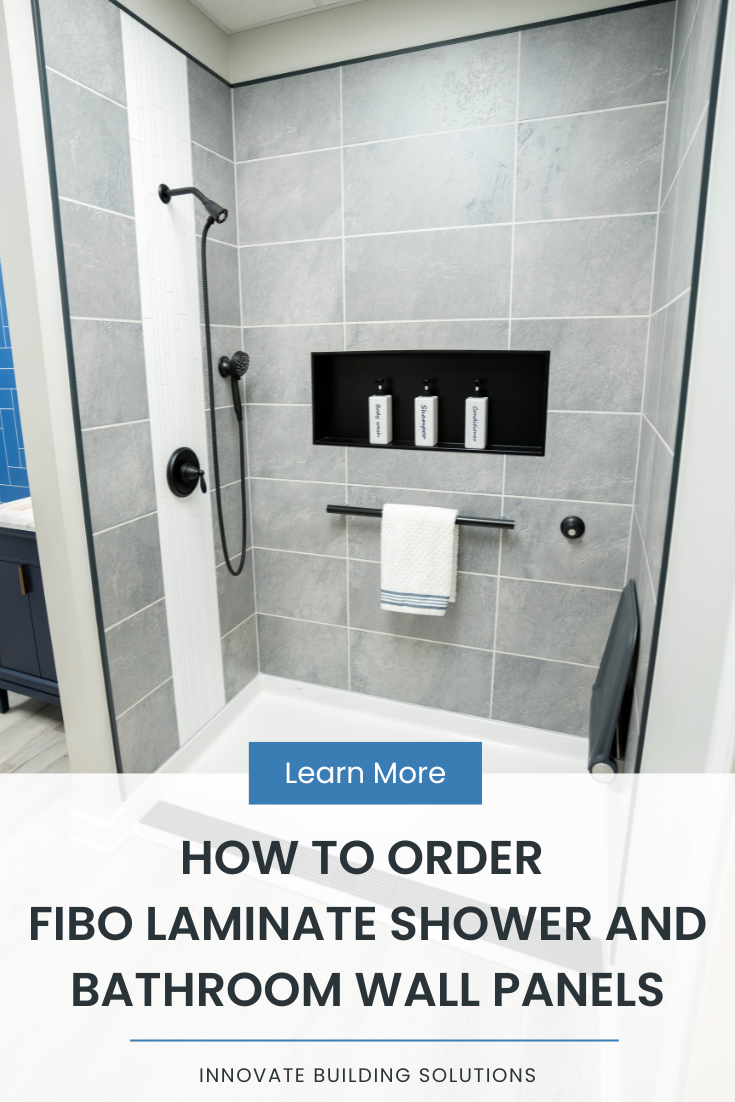
Ordering shower and bathroom wall panels IS NOT something you do every day (or every year or 5 years for that matter) if you’re a homeowner. However, if you’re a bathroom remodeler you may order them every day, but that’s another story.
And if you’re considering buying Fibo laminate shower or bathroom panels for the first time (because they’re more stylish and sturdier than fiberglass or acrylic panels) you want to make sure you make a smart purchase (and don’t buy too few or too many panels … or choose one which won’t fit your decor).
So, the question is how do you order Fibo laminate panels for your home or business? How can you make sure you have EVERYTHING you need before starting?
As an owner of a company who wholesales these panels to homeowner, contractors, commercial property owners, and dealers across the United States, our team is helping people daily with this very question.
In this article my goal is to do two things:
Give you a 7 step process to effectively (and efficiently) order Fibo shower or bathtub wall panels.
Answer frequently asked questions about what you need to order if you have a window, bench seat, or are adding wainscoting or bathroom wall panels beyond your tub or shower alcove.
In addition, I’ll include a video with 5 examples showing how to figure out the number of panels you need for an alcove shower, walk in shower, bathtub surround or full bathroom.
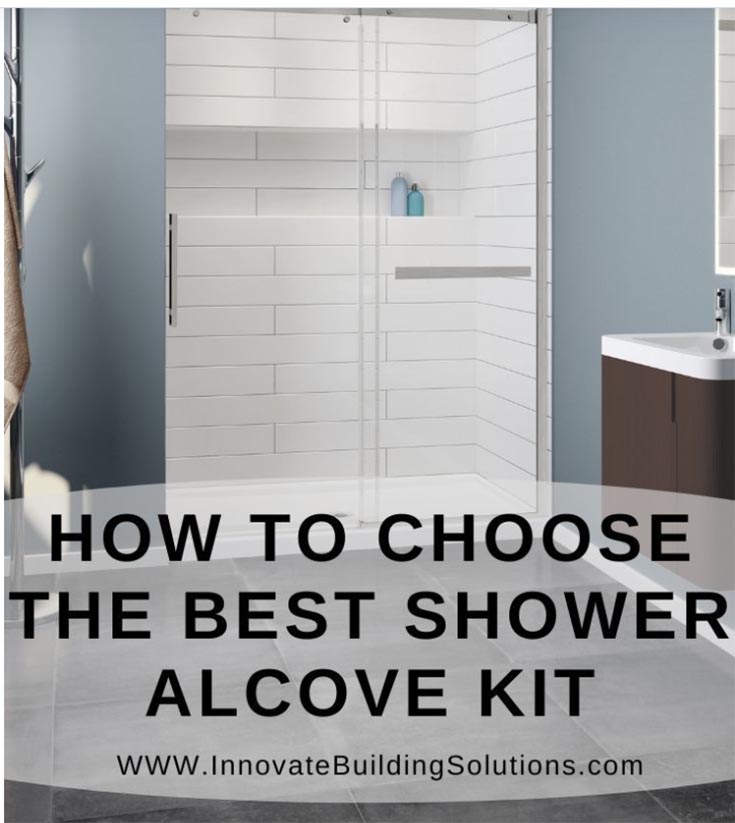
A 7 Step Process to Order Fibo Laminate Shower and Bathtub Wall Panels
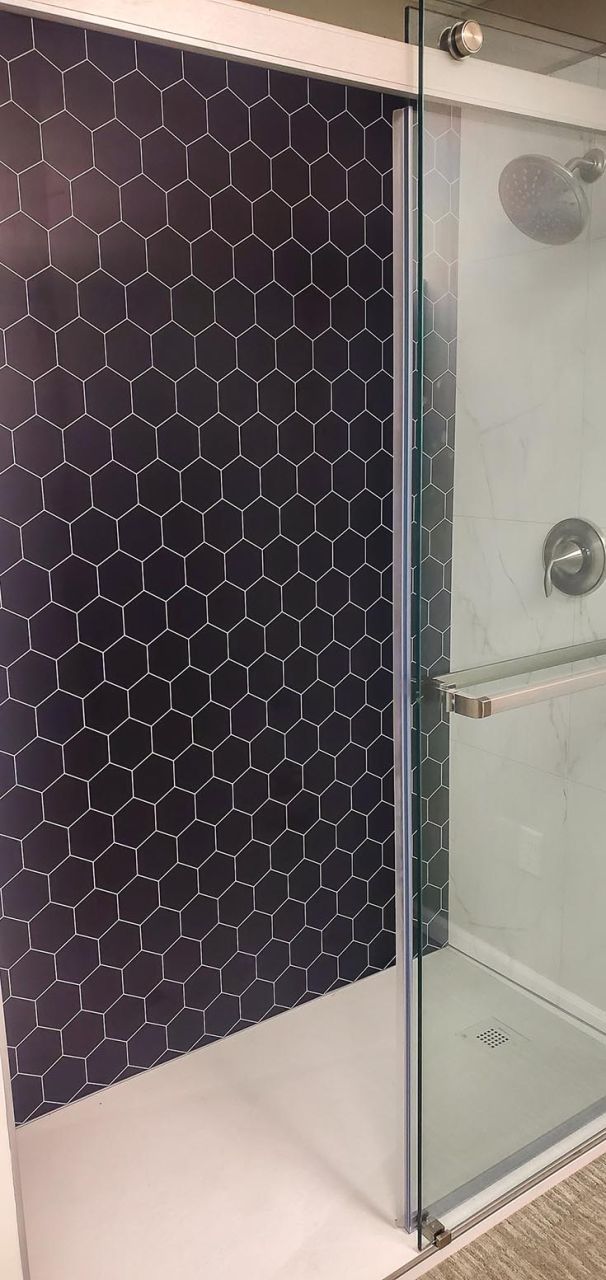
Step #1 – Determine the pattern(s) you like, and which walls you want to cover.
Since laminate wall panels look more realistic than molded fiberglass, acrylic or cultured stone, they can be used beyond the tub/shower alcove and into the bathroom itself. And because there’s 29 different patterns (and kits are assembled at the time an order is placed), you’re not forced to use one pattern on all walls. You can mix up patterns to create a feature or accent wall.
So, if you love black hexagon – but don’t want your shower or bathroom to be too dark – you could use black hexagon for a feature wall, and bianco marble on the side walls as you’ll see in this picture.
Each pattern has a stocking code. For example, the bianco marble is called a ‘TRANS-BM-2424.’ This code means its from the ‘Transitionalist collection’ (TRANS), it’s a Bianco marble pattern (BM), and the faux tile size once it’s installed will be 24” x 24” (2424).
Step #2 – Figure out how tall you want the tub, shower, or bathroom panels to be.
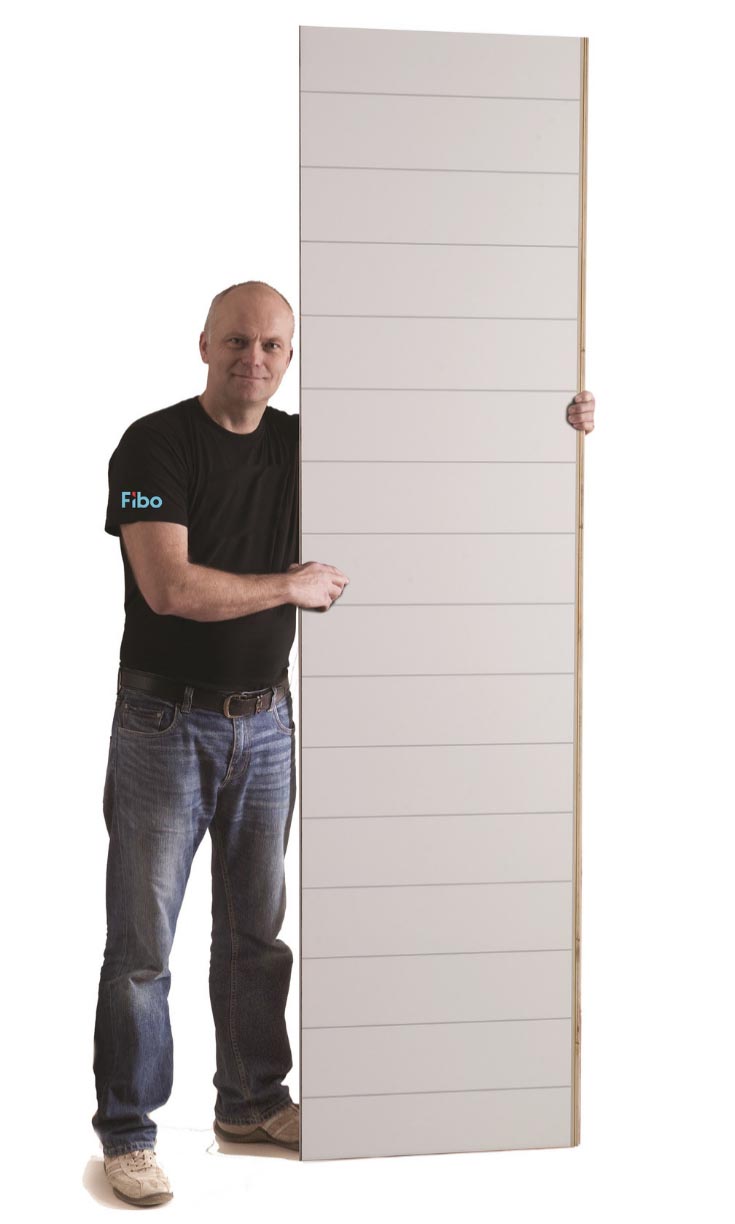
Although most alcove tub and showers are 8’ high or shorter (and one vertically oriented laminate wall panel with a shower pan or tub at the bottom will reach to the ceiling), you may have 9’ bathroom walls and are considering running the panels to the top of your taller ceiling.
If this is the case, it’s possible to use the 94.4” high (stock-sized laminate panels) and ‘stack’ another panel on top the full panel (depending on the pattern) or to order special sized panels which are 107” tall (almost 9’).
Step #3 – Compute the number of panels you need for each wall. Identify your kit.
OK – for math lovers, we’ve come to the step you’ve been waiting for. And if you’re not a math lover and still break out in a cold sweat thinking about your 7th grade Geometry teacher, I’m sorry there’s some basic math involved in this step…but you’ll be glad to know there’s ZERO Geometry skills needed!
The good news is the math to figure out the number of panels you likely mastered in elementary school (but if not, a calculator will work fine).
Since most panels are 23.6” wide (except the vertical white and black accent panels which are 11.8” wide) you’ll divide the width of your walls by the width of the wall panels.
For example, if you have a 60” back wall for a replacement alcove shower divide the 60” wide wall/23.6” wide panels and you’ll see you need 2.54 panels (which you’ll round up to 3). And when you’re installing these materials, our installation team recommends putting the ‘full’ panel in the middle (especially with a tile joint pattern) and cutting the 2 panels on the sides so the tile pattern looks symmetrical.
Continuing with this standard alcove shower example, let’s say you have 32” side walls. You’ll use this same equation (32” wide wall/23.6” wide panels) which would be 1.36 panels per wall. Round up to 2 panels.
Now, some of you may be asking, can’t I take the extra from the cut panel and use it on the other side wall? The answer is yes and no.
If you’re using a pattern without a tile grout look (like the popular cracked cement wall panel – which is MOMI-CC-0000 – Modern minimalist collection, Cracked Cement, 0000 means no grout joint), it’s fine to ‘share’ the partial panel from one side to another. This will reduce the number of panels for a 60” x 32” shower kit by one panel (you’ll use a total of 6 panels in this case – 3 for the back wall and 1 ½ for the two side walls).
However, if you’ve chosen a tile grout pattern (let’s say TRANS-HG-2412 – Transitionalist, High Gloss White with a 24” x 12” pattern) if you try to ‘share’ the cut panel, the ‘faux tiles’ won’t look symmetrical (and if you’re putting this shower in for my wife (and any other O.C.D.-esque people) THAT AIN’T GONNA CUT IT!).
So, in this example with a 60” x 32,” 3 wall alcove shower, if you’re using a tile pattern (and want everything symmetrical) you’d need 3 panels for the 60” back wall, 2 panels for the left side (so both finished ‘tiles’ on the side will be 16” wide after you cut them) and 2 panels for the right side. This would mean you’d need a 3 wall alcove shower kit with 7 total panels (3 + 2 +2). Wow, I’m good at math. That Carnegie-Mellon University education has come in handy.
A 7-panel, 3 wall alcove shower kit is identified as:
IBS-3W-LAA
‘IBS’ stands for (Innovate Building Solutions), 3W means 3 walls, and LAA means (large alcove). And if you wanted to purchase mixed patterns, you could use, for example, 3 black hexagon panels for the back wall and 4 bianco marble panels to do your 2 side walls.
And what’s nice about buying a shower kit is it ships complete with sealant, trim profiles (see step 4 for more about this), screws, cleaning supplies, and the finishing tool you’ll need. The only thing you’ll have to buy is the backer board (where Oriented Strand Board -A.K.A. OSB- or strips of OSB are recommended).
In addition, here’s 2 ordering tips to keep in mind.
1) DO NOT buy wall panel ‘packages,’ buy pieces. You’ll see some companies only sell the wall panels by the package (and there’s 2 panels per package). In the above example you’d need to buy 8 panels for a 7 panel job. However, for a more efficient buy – get a kit with exactly the number of wall panel ‘pieces’ you want.
2) Don’t buy ‘a la carte,’ buy a kit – For a product like laminate wall panels buying the wall panels only is a baaaaaad idea. Here’s why. With the kit you’ll get Fibo sealant specifically formulated (and warrantied) to go with the Fibo wall panels. You’ll also get the right number of trim profiles and the right type of screws. You won’t be searching frantically for supplies when you need to get the job done. You also WILL NOT need to worry about product failure because you used manufacturer approved materials. As my dad used to say, “Don’t be penny-wise and pound foolish.”
And if you want more examples to nail down (no construction pun intended) the ordering process, watch the video below. (Note – this video will be uploaded by the end of June 2023).
Step #4 – Choose your shower trim.
The finishing touch on your wall panel kit are the edge, top, and corner trim pieces. There are 3 finish choices – white, matte black, and brushed nickel. And what’s really cool is they’re all the same cost.
If you want the trim to blend in with the walls, white trim is smart with white shower wall panels (which include white high gloss 24 x 12, white herringbone, and white subway tile to name a few).
If you want bold trim (in a modern farmhouse décor, for example), matte black offers an eye-popping contrast over a white wall panel.
Image Source: Best Construction Brands
And if you’re using brushed nickel shower trim (because you hate spots with your bright chrome or brass hardware today), the brushed nickel trim works perfectly.
In laminate wall panel kits, you’ll get ‘small L’ profile for the outside edges of the wall and ‘long L’ profiles for the top of the wall (note: put the large edge of the long L profile on the wall so it can cover ceiling height variations or cuts which aren’t as perfect as you’d like).
And if you need – there’s also 90 degree outside profiles (to turn a corner) and a 45 degree trim for NEO angle showers.
Step #5 – Determine what else you need – beyond the wall panels – to complete your shower, bathtub, or bathroom.
If the only thing you had to figure out was the wall panels –a bath remodel wouldn’t be as hard to get your arms around as it is. However, here’s a few more items you may need.
A complete shower kit including the shower pan and glass door.
For a new construction or replacement alcove shower it’s nice to make sure your wall panels work with your base which also works with a glass shower door. And if you want to know you won’t have compatibility problems (and no, this isn’t about personal compatibility – ha! ha!) the solution is to look for a complete shower kit.
And if you don’t know what a complete shower kit is, it’s when you purchase a shower pan, wall panels and a glass door together to save money, time, and aggravation. For insights on how to choose a compete shower replacement kit read, How to Choose the Best Alcove Shower Kit.
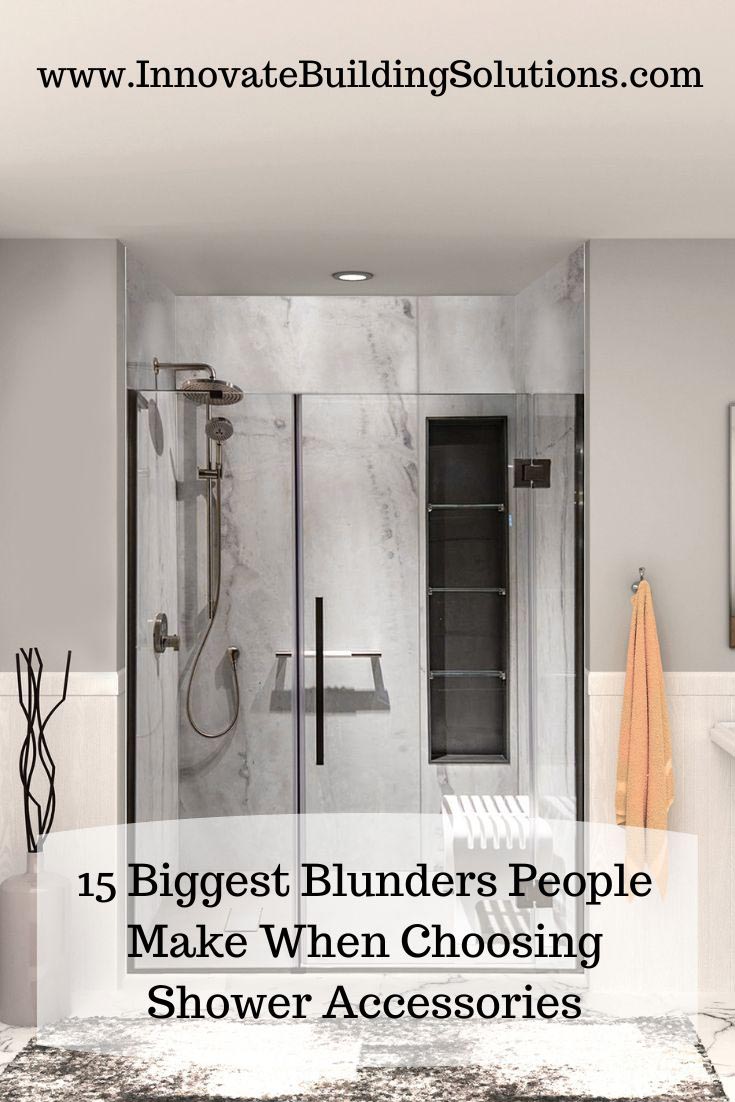
Shower Accessories.
Even if you have a wonderful shower, if your balance or mobility isn’t good, a standard shower may not be safe. In addition, if you don’t have the right shower storage you could be leaving shampoo bottles on the floor (which is a slip and fall hazard). A smart tub/shower has the right accessories.
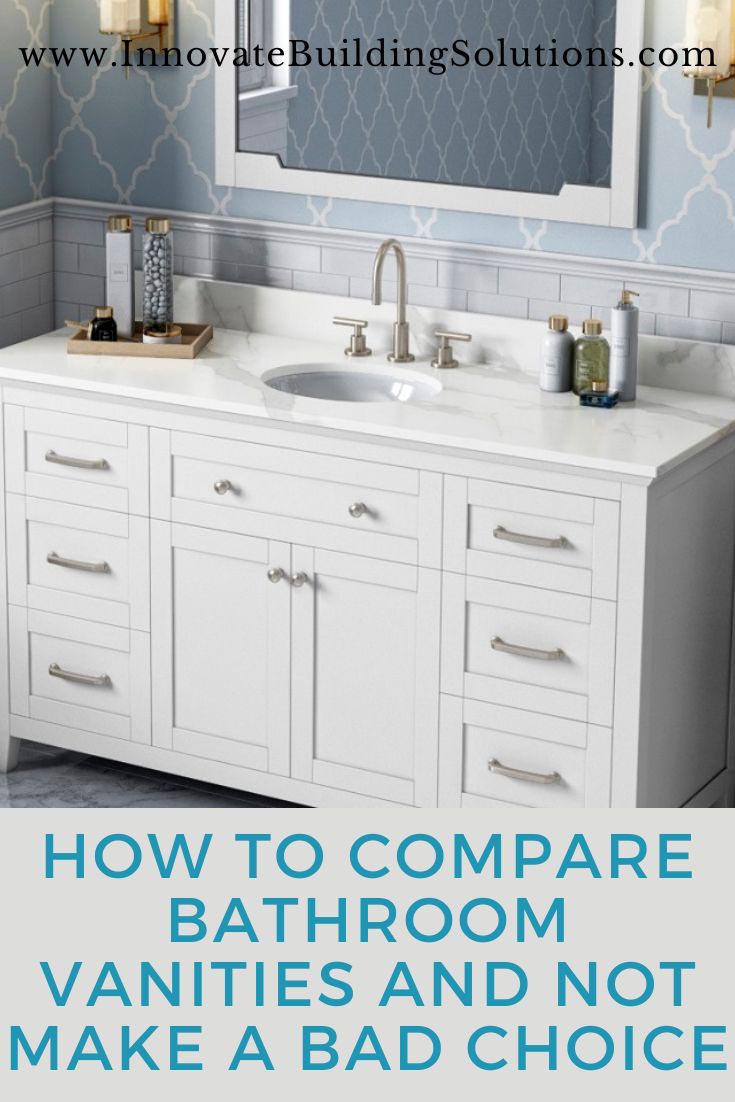
In addition to the wall panels, you can make a ‘statement’ (as fancy designers say) – and increase much-needed storage with a new bathroom vanity. And while you could pick up a cheap, stapled-together, particle board vanity at a home center, if you’re planning to stay in this home a while, grabbing the first vanity you can find may NOT be a great idea.
Step #6 – See how your bathroom products look together.
The problem with going from store to store to store to make bathroom selections is you can’t see how everything looks together (like you will after they’re installed…and maybe it’s too late).
#2) Email your design to Product Specialists at Info@InnovateBuildingSolutions.com, and/or call at team member from the About Us page (where you’ll find individual email addresses and cell numbers).
Frequently Asked Questions About Ordering Fibo Laminate Shower and Bathtub Wall Panels for Windows, Bench Seats, and Wainscoting
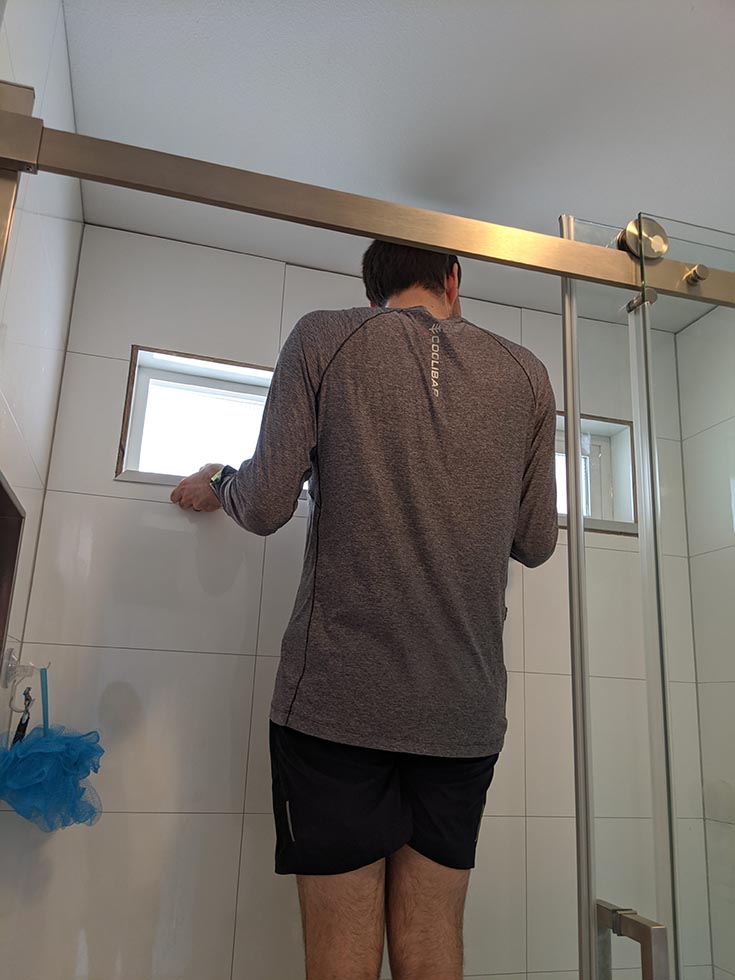
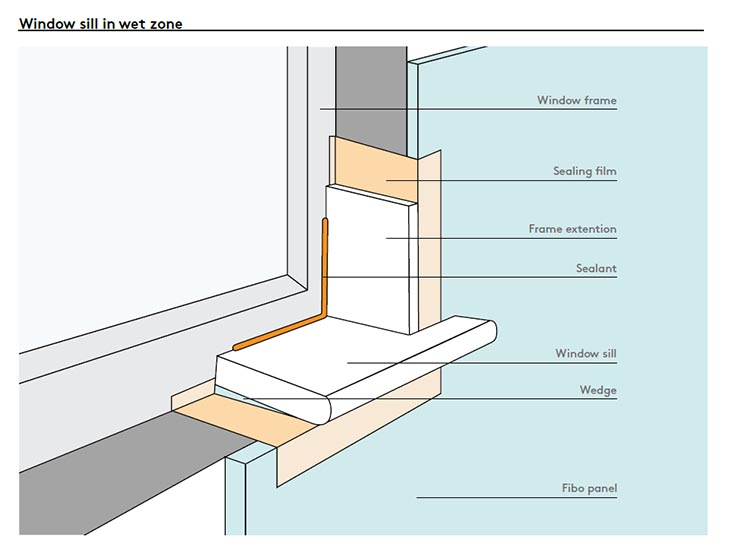
FAQ #1 – How do I work around a window with laminate wall panels? What parts do I need?
Although I’ve seen people do it, I think it’s a T-E-R-R-I-B-L-E idea to cover your window with a wall panel system. Natural light helps to (literally) brighten your day – and it makes your bathroom and shower safer.
However, it can be hard knowing how you do this and having the right materials to accomplish the job.
The good news with Fibo wall panels is it’s not expensive (or difficult) to waterproof around a shower, bathtub, or bathroom window.
As you’ll see in the diagram below, you’ll use the laminate material (usually the offcuts from the walls to do this…for no extra cost I might add) around the two sides and the top. To cover the edges, order extra-large L trim pieces (they come in 94” lengths). For most projects you’ll only need 1 or 2 trim pieces for a window.
At the bottom of the window use a waterproof sill made of cultured marble, cultured granite, granite, or quartz.
FAQ #2 – How do I finish my fixed bench seat in a laminate shower system?
Although I’ll admit I’m NOT a fan of fixed bench seats because they take up a lot of room (I prefer a fold down bench seat), there are times where you need a sturdy transfer bench seat – or you have a large bathroom and a fixed seat can provide seating and/or storage for towels or shower products.
And when you want a fixed bench seat it begs the question, how can I make sure the seat is waterproof AND I have the right number of wall panels to cover it?
Well – the first thing to realize is Fibo laminate panels are only used on vertical surfaces. Therefore, you should use materials like cultured marble, cultured granite, or quartz for your seat topper. As far as the wall panels go, you can cut the same panel you’re using behind the seat to cover the 16” to 20” high area below your bench seat.
Image Source: Best Construction Brands
Remember, you also will need to cover any walls on the side of the seat if it’s framed on both sides.
FAQ #3 – How many wall panels will I need if I want to add wainscoting in the bathroom?
Standard wainscoting generally is 1/3 to ½ of the height of the wall and is used to eliminate damage behind bathroom walls (especially around toilets or vanities). It will be from 36” to 48” high.
In most cases people use ½ a full Fibo panel (which is 94.4” high) for wainscoting. And since the width of a sheet of Fibo is 23.6” wide, when you cut the full panel in half (then use the two pieces) you’ll get about 47” (47.2” to be exact) of wainscoting coverage from one full sheet.
And one last FAQ– Is there anything extra I should order with my Fibo panels?
Whether you’re a DIY homeowner, or a professional contractor, or an installing dealer of wall panels, the last thing you want to do is NOT have everything you need (and then experience delays or extra shipping costs).
Given this, me and my team are frequently asked by our dealers, contractors, and homeowners alike, “Is there anything else I need I might be forgetting?” And two things come to mind:
Get one or two Fibo grips – The Fibo grips are $20/piece and make it easier to grip and lock the panels. Note – grips are more effective with large faux tile wall panel designs or designs without grout lines.
Consider buying an extra panel – When I’m asked if an extra panel is needed I’ll answer yes, no, and maybe. OK – that’s a cop-out answer, but here’s what you want to consider. If you’re an installing dealer who will be continually reselling laminate wall panels, I recommend an extra (A.K.A. your plus-one panel) just in case your team makes a mistake cutting (besides you’ll have one available for the next job).
On the other hand, if you’re a consumer – who’s on a tight budget – you may not need the extra panel. However, the risk is if you (or your contractor) does make a mistake you’ll have the cost of the panel plus crating and freighting to consider.
So, are you confident you know what wall panel kit you need? Would you like our team to double-check your numbers and/or quote your project?
I hope you’re now confident you’ve figured out the right Fibo laminate wall panel kit for your project. And although (if I’m a good teacher) you should be ‘spot-on’ knowing what you need, it’s always nice to have someone ‘check your numbers,’ and price these materials. And our team would be glad to help.
And BTW – if you’re an installing contractor and would like to learn about becoming a dealer of laminate wall panels (and other bath/shower products) call Mike at 888-467-7488.
Thanks for reading (and putting up with my wackiness!).
President of Innovate Building Solutions a nationwide supplier and regional (Cleveland and Columbus) remodeling contractors. Some of our product lines include glass counters, floors, backsplashes, glass blocks and grout free shower and tub wall panels
Mary – feel free to call our office at 877-668-5888 and they can give you info about our contractors and assist with your project. We appreciate your interest – Mike Foti, President
Mary Fagan
Do you have a list of contractors in Los Angeles that install your shower kits? Thank you in advance for your assistance.


")


")


")

Mike Foti
Mary – feel free to call our office at 877-668-5888 and they can give you info about our contractors and assist with your project. We appreciate your interest – Mike Foti, President
Mary Fagan
Do you have a list of contractors in Los Angeles that install your shower kits? Thank you in advance for your assistance.